
Twice in the past week, I bought an ingredient thinking it was one thing and found out after I got it home that it wasn't at all what I thought I was buying.
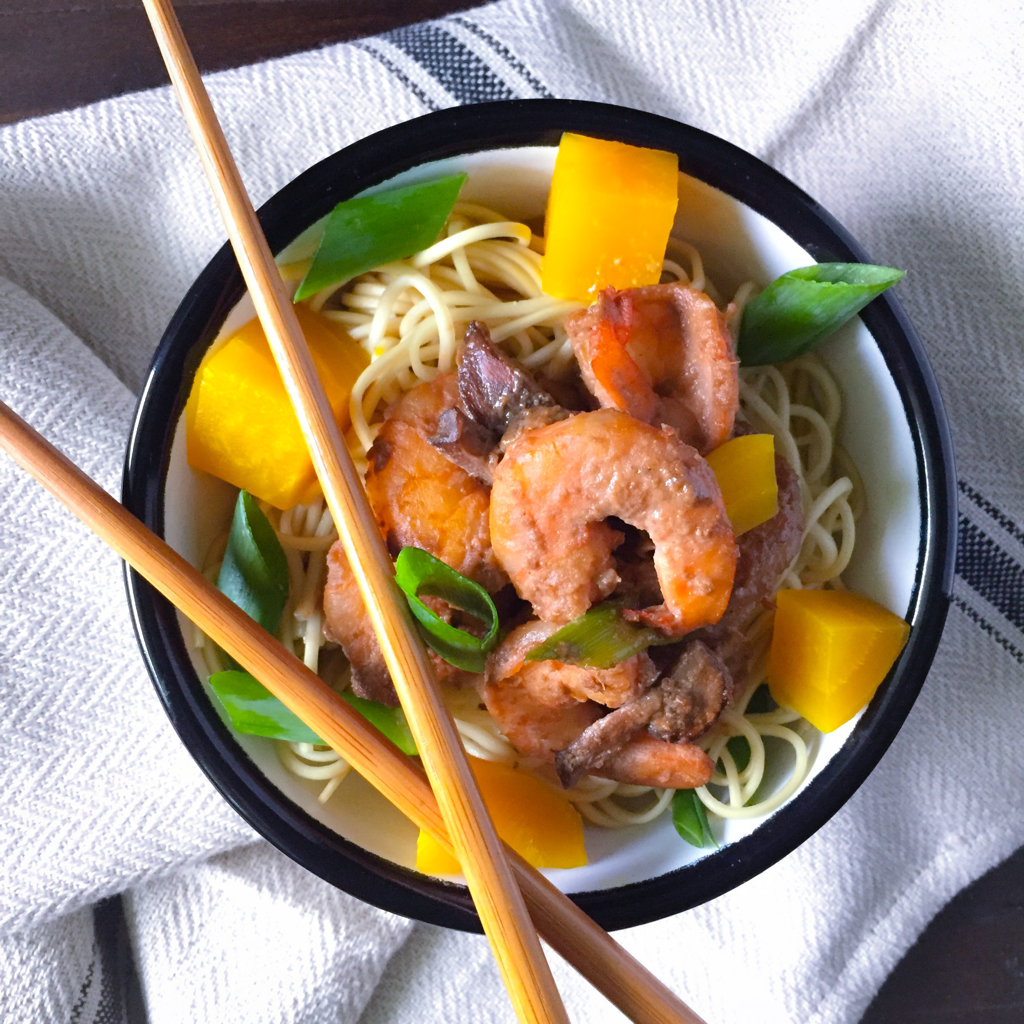
Is this what happens at 40 - your brain starts the slow fry into old age and you catch yourself doing things you never used to do?
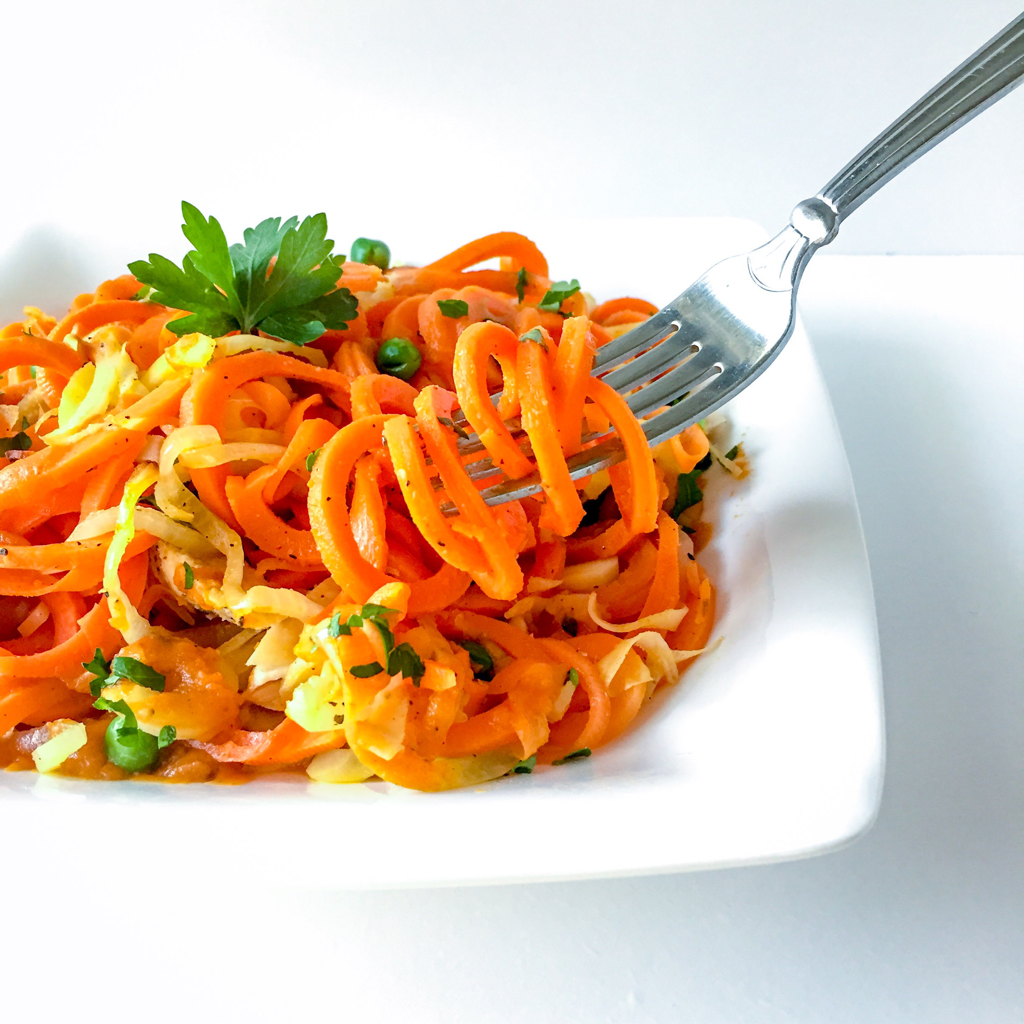
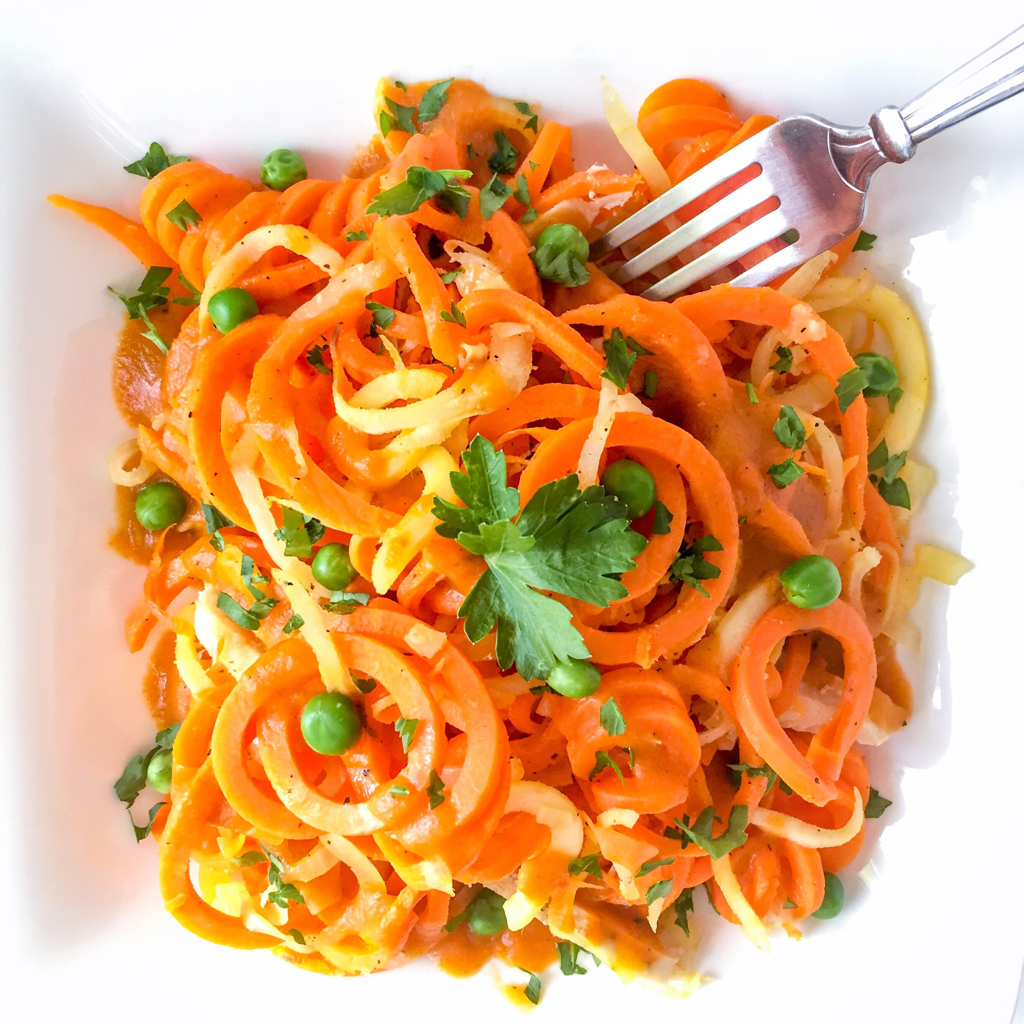
Take the noodles in this recipe. I thought they were soba, made of gluten free buckwheat flour and visibly darker than regular noodles. What I actually bought were lo mein noodles blended from egg whites, wheat and soy flours.
Fortunately noodles are like the color black, they go with anything. Good news, because I threw in something a little unusual for an asian noodle dish - beets. See the gold nuggets in the above photo? Those are golden beets. Unlike their red counterparts, these guys do not bleed color all over the place which makes them great for adding to whatever dish you like. They are also easy to cook - just peel, wrap in foil and roast at 350ºF for an hour.
In fact, the beets are the only thing about this recipe that take any time at all and can be prepared ahead of time. The noodles cook in 4 minutes, the vegetables just slightly longer and the sauce is equally quick and easy. In other words, this is the perfect asian summer noodle dish when the stove is the last place you want to be.
{Follow me on Instagram for more healthy recipe inspiration!}
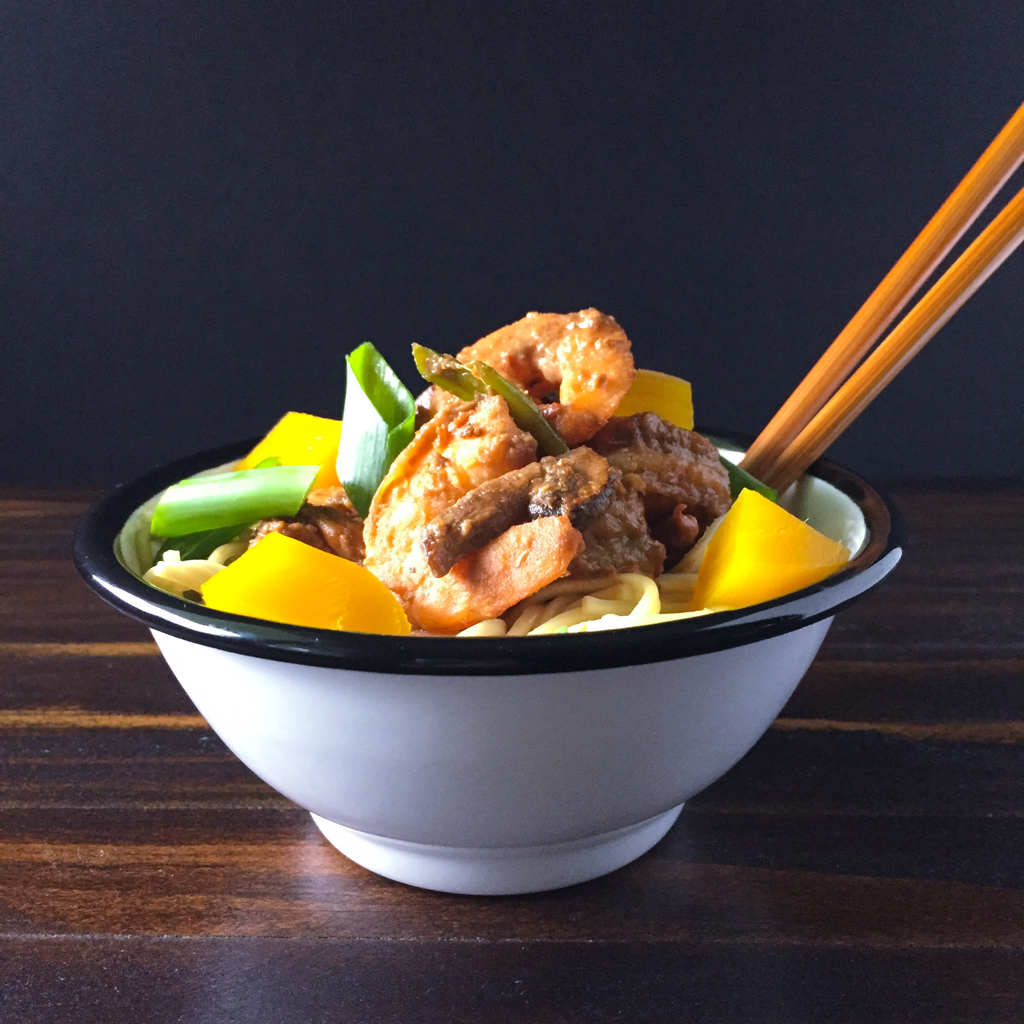
Is this what happens at 40 - your brain starts the slow fry into old age and you catch yourself doing things you never used to do?
Take the noodles in this recipe. I thought they were soba, made of gluten free buckwheat flour and visibly darker than regular noodles. What I actually bought were lo mein noodles blended from egg whites, wheat and soy flours.
Fortunately noodles are like the color black, they go with anything. Good news, because I threw in something a little unusual for an asian noodle dish - beets. See the gold nuggets in the above photo? Those are golden beets. Unlike their red counterparts, these guys do not bleed color all over the place which makes them great for adding to whatever dish you like. They are also easy to cook - just peel, wrap in foil and roast at 350ºF for an hour.
In fact, the beets are the only thing about this recipe that take any time at all and can be prepared ahead of time. The noodles cook in 4 minutes, the vegetables just slightly longer and the sauce is equally quick and easy. In other words, this is the perfect asian summer noodle dish when the stove is the last place you want to be.
{Follow me on Instagram for more healthy recipe inspiration!}
Ingredients:
4 ounces soba or lo mein noodles
olive oil
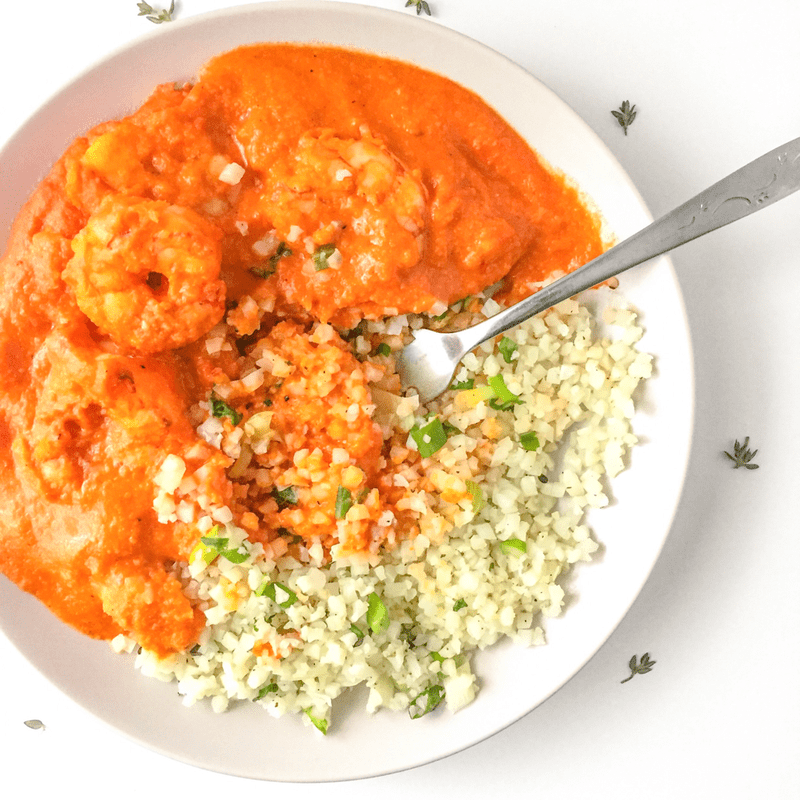
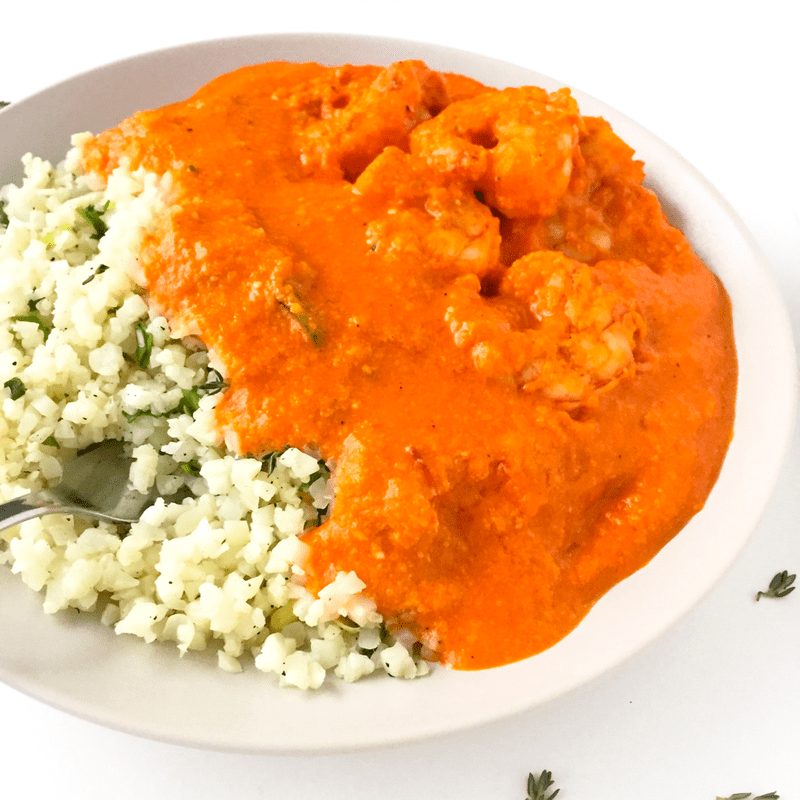
1/2 lb. shrimp, peeled and deveined
5 medium baby bella mushrooms, chopped
1 scallion, chopped, green ends reserved
1 teaspoon grated fresh ginger
2 cloves garlic, minced
3 tablespoons tamari or soy sauce
1 tablespoon tahini
3 tablespoons water
2 cooked golden beets, diced
Directions:
Bring a pot of water to a boil and add the noodles. Cook for 4 minutes, or according to package directions. Drain and set aside.
In a saucepan, heat 2 tablespoons of oil over medium-high. Add the shrimp and cook 2-3 minutes on both sides. Transfer to a dish and set aside. Add another tablespoon of oil and cook the mushrooms until golden brown, stirring frequently, for about 5 minutes. Stir in the white portion of the scallion, ginger, garlic, tamari (or soy) sauce and tahini. Add the water to thin out the sauce. Continue cooking for another 2-3 minutes. Remove from heat and toss with the cooked noodles. Add the beets and the reserved scallion greens. Serve immediately.
Yield: 2 servings
4 ounces soba or lo mein noodles
olive oil
1/2 lb. shrimp, peeled and deveined
5 medium baby bella mushrooms, chopped
1 scallion, chopped, green ends reserved
1 teaspoon grated fresh ginger
2 cloves garlic, minced
3 tablespoons tamari or soy sauce
1 tablespoon tahini
3 tablespoons water
2 cooked golden beets, diced
Directions:
Bring a pot of water to a boil and add the noodles. Cook for 4 minutes, or according to package directions. Drain and set aside.
In a saucepan, heat 2 tablespoons of oil over medium-high. Add the shrimp and cook 2-3 minutes on both sides. Transfer to a dish and set aside. Add another tablespoon of oil and cook the mushrooms until golden brown, stirring frequently, for about 5 minutes. Stir in the white portion of the scallion, ginger, garlic, tamari (or soy) sauce and tahini. Add the water to thin out the sauce. Continue cooking for another 2-3 minutes. Remove from heat and toss with the cooked noodles. Add the beets and the reserved scallion greens. Serve immediately.
Yield: 2 servings


 RSS Feed