Embody Fitness & Nutrition
  • Blog
  • Recipe Index
  • Cooking Videos
  • About Me
    • Additional FAQ's
    • Published Work
  • Contact

Copycat Crispy Quinoa VegeFi Burgers

6/1/2017

7 Comments

 
Picture
**UPDATE**
I first shared this recipe back in October of 2015. Somehow, bad photography and all, it endures as one of my most visited blog posts to date. 

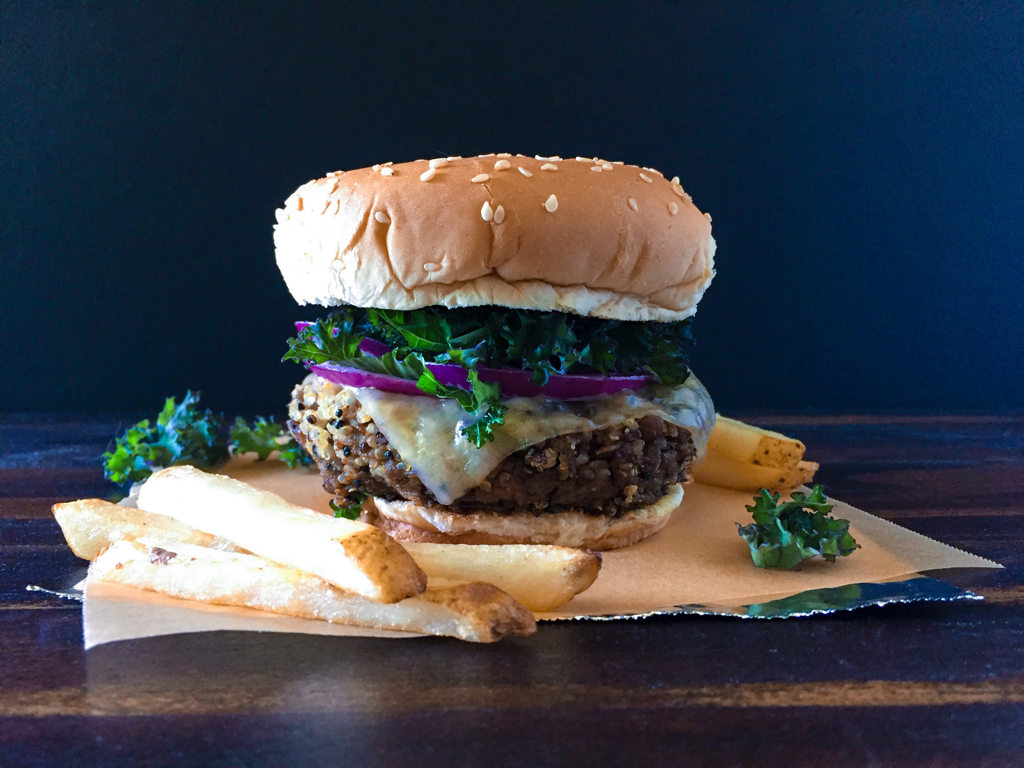
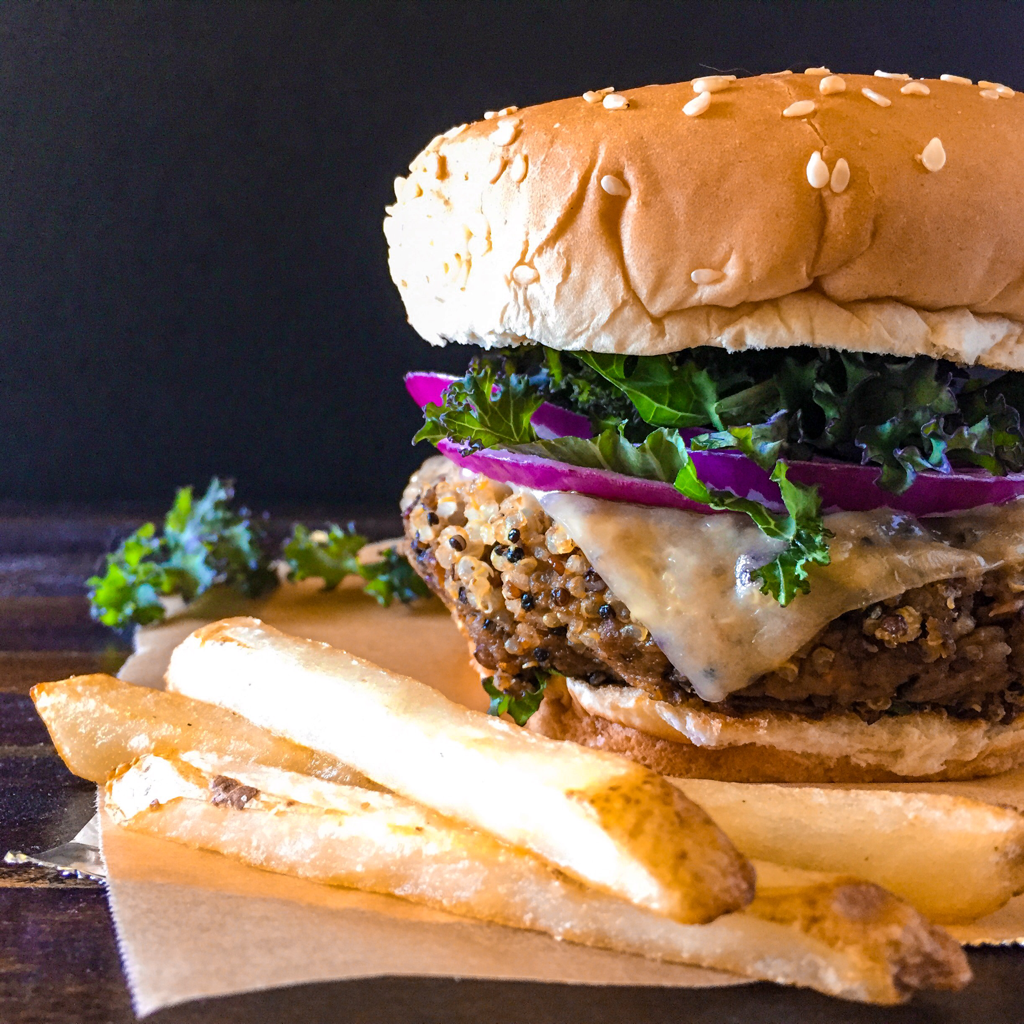
Since then, not only did I update the photographs to capture an actual view of the burger, I also tweaked the recipe and cleaned up the directions. To anyone who isn't much of a cook, the recipe might seem intimidating as written. There are a lot of ingredients in this one. But if you read through the directions and just focus one step at a time, it's not so bad. Not to mention that this makes a nice big batch that you can store until you next crave a VegeFi Burger. (Keep reading below for tips.)

Years ago during a culinary class, I remember the chef teaching us the key to a good copycat recipe. First, when not privy to the secrets of the authentic version, identify as many specific ingredients as possible through visuals and taste. (In other words, I had to examine and eat a LOT of VegeFi Burgers.) Then shift the focus to overall flavor, adding and subtracting ingredients to find what works. Be willing to make the item over and over, until a blind taste test can't detect any difference between the copycat and the original.

After much trial and error, I believe I have accomplished that here. 

One difference worth pointing out - the real VegeFi Burger is vegetarian-friendly only, not vegan, due to the additions of egg and cheese. With my version, a vegan person has the option to omit the cheeses without dramatically changing the flavor of the burger all that much - and egg is not at all a part of my ingredient list. Also, while the original burger is topped with the usual lettuce-tomato-onion, changing things up by omitting the tomato and swapping out the lettuce with purple kale is a tasty alternative. 

Another tip I neglected in my original post is how well these burgers freeze. Simply wrap in parchment paper and place in an airtight container or ziplock bag. Then defrost and bake at 400ºF in a toaster oven for 5-7 minutes per side.

OCTOBER 2015:
​
I feel lucky that, for the time being, I live just a five minute walk from local shops and restaurants. It's a nice feeling to have convenience packaged into a cute little town only steps away. When a new storefront opens, it's exciting because each one is unique. Just last year, my neighborhood acquired a new BurgerFi restaurant. A little more casual urban than some of the other establishments in the area, it quickly became popular with the local college crowd. 

I normally avoid processed fast food, but being new, I had to try it. For all of us health and fitness advocates out there, I'm sad to say...it was good. It was REALLY good. Then on about the fourth or fifth visit, I tried the Crispy Quinoa VegeFi Burger. WOW! I have never had a veggie burger quite like that. For me, it even beat their beef burgers. But while I admire BurgerFi's efforts to use quality, hormone and antibiotic-free ingredients, they are technically a fast food franchise. I tend to feel better not eating there too often. Particularly since their fries are so tempting. However, I really want that crispy quinoa burger in my regular rotation.

For those of us trying to embody fitness and nutrition while still enjoying decent food, here is my healthier copycat version. I won't go so far as to claim it's exactly like the authentic VegeFi burger. Or even as tasty. Though I doubt anyone will be disappointed after biting through the crunchy quinoa crust into the smooth saltiness of the burger, and the tangy remoulade sauce. 
Picture
Burger Patties:

Ingredients:


Burger Patties:
1 cup uncooked quinoa
1 cup uncooked small green lentils
extra virgin olive oil for cooking
salt and pepper to taste
1 medium onion, chopped
1 medium zucchini, shredded
2 medium carrots, shredded
12 baby bella mushrooms, finely minced
2 cups red wine
1 cup vegetable broth
4 sprigs fresh thyme
1/2 cup freshly grated Parmesan cheese, optional
1/2 cup freshly grated Fontina cheese, optional
2 cups plain panko breadcrumbs

Toppings:
​8 slices white cheddar cheese, optional
8 multigrain or sesame rolls, toasted, 
1 medium red onion, sliced thin
8 slices tomato
1 cup lettuce or purple kale leaves, shredded
1 cup vegetarian remoulade sauce, see recipe below**

Directions:
In a medium-size saucepan, bring 2 1/2 cups of water to a boil. Add the lentils, turn heat to low and cover. Cook for 35 minutes, or until lentils are soft and water is absorbed. Meanwhile, in a separate saucepan, bring 2 cups of water to a boil. Rinse the quinoa before adding to the boiling water. Turn heat to low, cover and cook for 15-20 minutes until the water is completely absorbed. Set the quinoa and lentils aside to cool.

In a sauté pan, heat the 2 tablespoons of oil on medium and add the onion. Stir in a pinch of salt and pepper. Cook until caramelized, about 15-20 minutes, stirring frequently. Add the zucchini, carrot and mushrooms. Continue cooking until softened, giving it the occasional stir. Add another pinch of salt and pepper to taste. Remove from heat and transfer the vegetables to a mixing bowl to cool.

Pour the wine and broth into the same sauté pan, add the thyme and bring to a slow rolling boil. Cook until reduced to 1/3 of a cup. Add the wine reduction, and the grated cheeses if using, to the vegetable mixture. Then stir in 2 cups of cooked lentils, 2 cups of cooked quinoa and the breadcrumbs. Transfer half of the mixture into a blender and puree. Spoon the puree back into the mixing bowl, and stir until evenly combined.

Pour the remaining cooked quinoa onto a cookie sheet. Use a rubber spatula to spread it into a thin layer. Form the vegetable mixture into 8 patties. Firmly press each patty onto the cooked quinoa layer. Flip the patties over and repeat. Then, gently press the palm of your hand around the edges and over the sides of each patty to ensure that the quinoa completely coats the patties in a thin layer. Brush off any excess.

Clean the sauté pan, heat the olive oil over medium high heat and cook the patties in small batches, 3-5 minutes per side. Use a thin spatula to gently flip the patties. When both sides are golden brown, add a slice of cheese if using, and cover the pan until the cheese melts. Transfer patties onto toasted rolls. Top with red onion, tomato, lettuce and remoulade sauce. 

Vegetarian/Regular Remoulade Sauce:
​
Ingredients:

1 cup vegan or regular mayonnaise
1 teaspoon onion powder
1 teaspoon garlic powder
1 teaspoon sweet relish
1 teaspoon Worcestershire Sauce
1 teaspoon Valentina mild hot sauce
1 teaspoon horseradish sauce, or 1/4 teaspoon plain horseradish
2 tablespoons fresh lemon juice
2 tablespoons chopped fresh parsley
6 chives, finely minced
salt and pepper to taste

Directions:
Whisk all ingredients together in a bowl. Chill until ready to serve.

Yield: 8 burgers

Pin It
7 Comments

Splendry: Chicken & Sun-Dried Tomato Quesadillas

5/29/2017

0 Comments

 
Happy Memorial Day!

Looking for some afternoon reading? Head on over to Splendry, a site geared toward "topics that are light, fun, informative and entertaining." Everything from repurposing household items to cool new beauty hacks can be found there.

While you're at it, check out my tried-and-true recipe for Chicken & Sun-Dried Tomato Quesadillas. A popular staple in my personal chef recipe rotation for many years, these quesadillas freeze well and are great for large gatherings. Need a vegetarian version? Jackfruit works nicely in lieu of the chicken. 

Many thanks to the staff at Splendry.com for the feature!
Picture
Pin It
0 Comments

Italian Style BLT Sandwich

8/16/2016

0 Comments

 
Picture
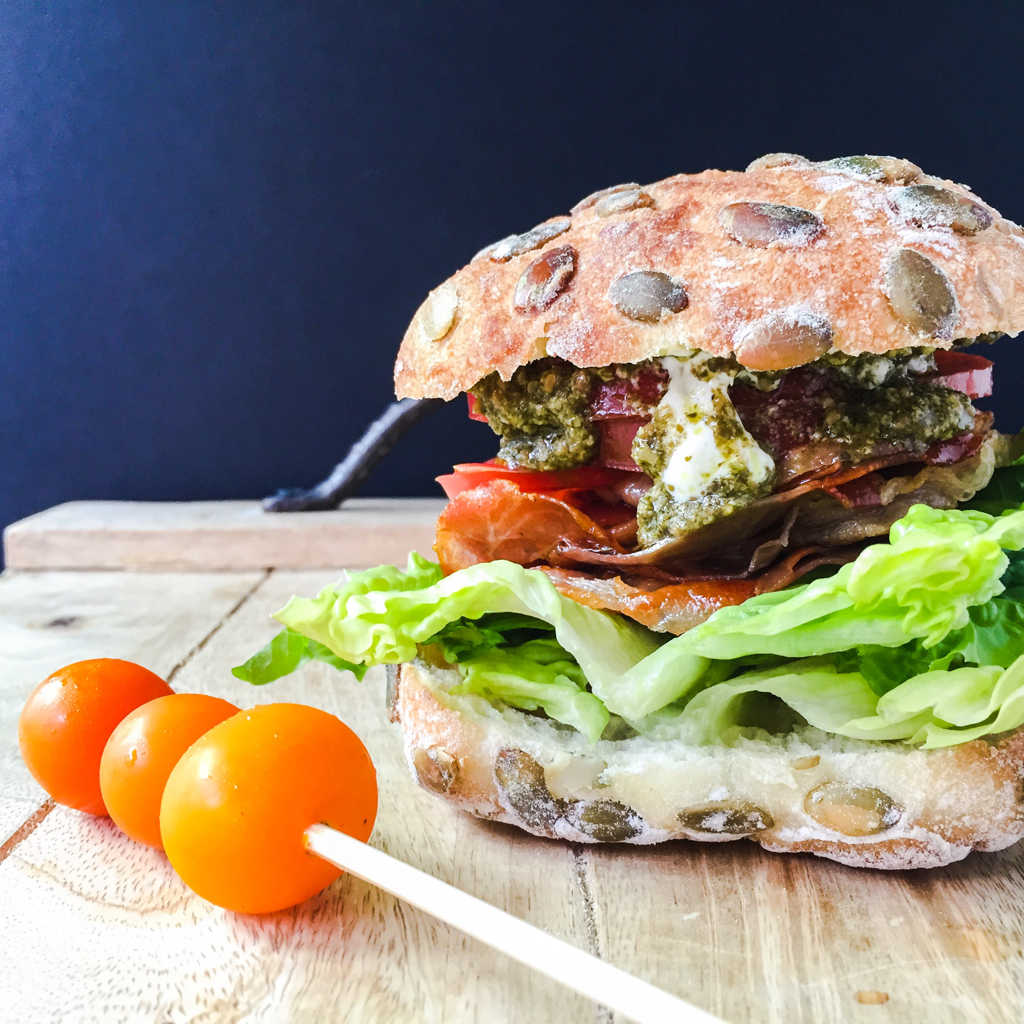
Earlier this week, I found myself in a conversation about BLT sandwiches, one of my all-time favorites. 

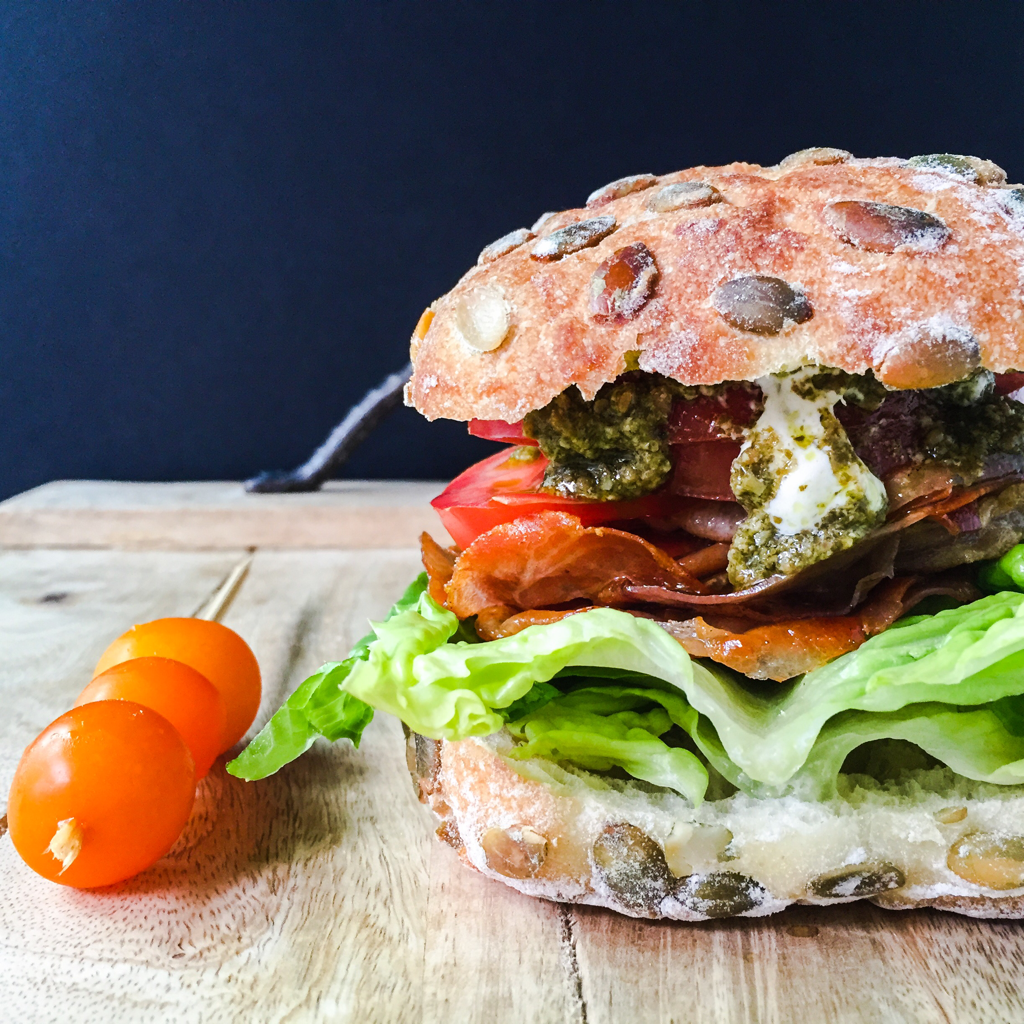
In spite of my country farm beginnings, red meat is less prominent within my diet with each passing year. Yet every once in awhile, something as simple as a conversation will give me a hankering for it. But even when I crave a food like red meat, bread or mayonnaise, I try to make it as healthy as I can without sacrificing flavor. For example, in lieu of greasy bacon, prosciutto can be used more sparingly while still imparting a ton of satisfying flavor. A whole grain roll is the best bread option, but if one is unavailable, consider a white flour roll if the size is not much greater than a dinner roll, or if it contains nutrient rich seeds. There are also many heart healthy substitutions for mayonnaise on the market that taste just as good as the real thing. 

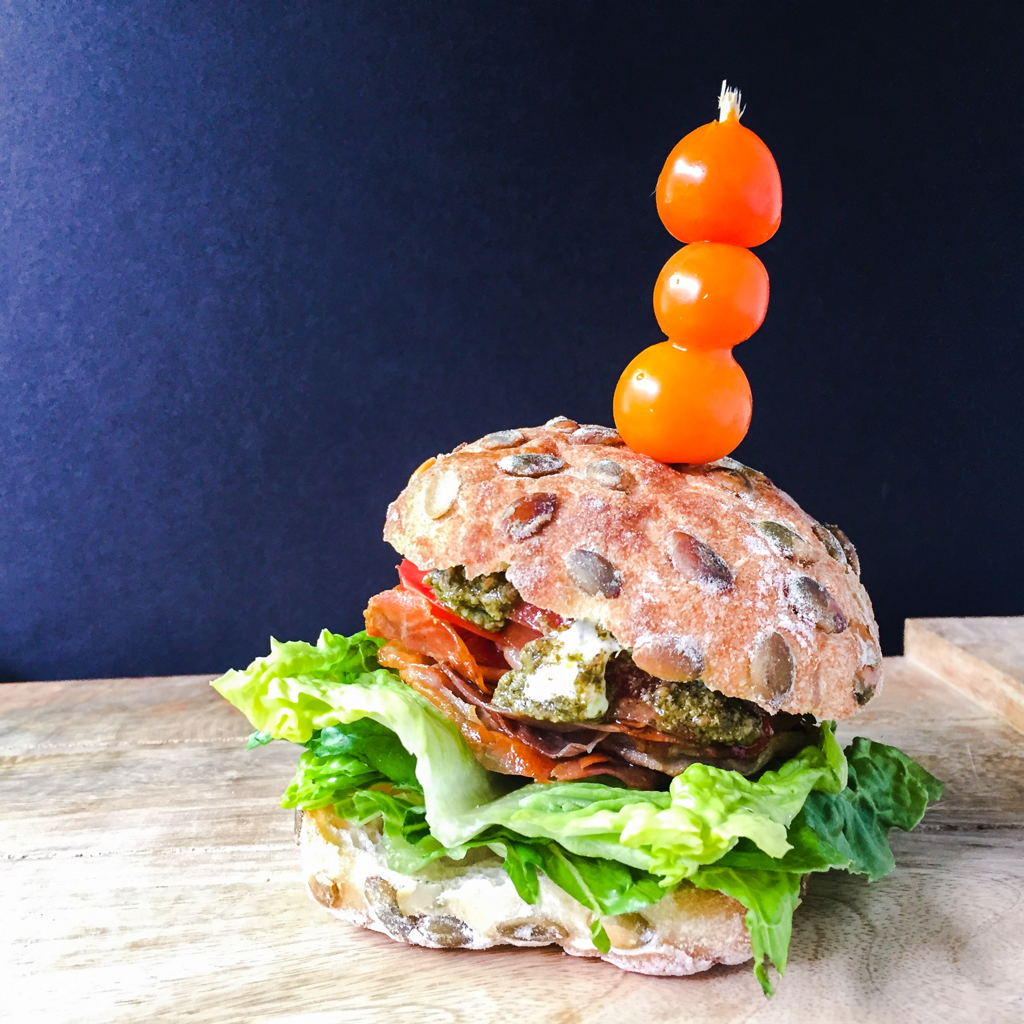
This twist on an old classic replaces bacon with a bit of prosciutto, includes an eggless pesto mayonnaise and a few store-bought ingredients to make life easier.

If you like this version, check out a similar post for a breakfast sandwich here: Prosciutto & Sun-Dried Tomato Pesto Sandwiches.
Picture
Picture
Ingredients:
4 ounces thinly sliced prosciutto
​2 soft whole grain or seeded ciabatta rolls, halved
4 romaine lettuce leaves, halved crosswise
1 tomato, thinly sliced
2 tablespoons Vegenaise or mayonnaise
2 tablespoons store-bought basil pesto


Directions:
In a non-stick fry pan, cook the prosciutto until both sides are browned. Remove from heat and drain on a paper towel.

Stack the lettuce, prosciutto and tomato onto the bottom halves of the rolls. Spread the Vegenaise and pesto over the cut side of the top halves of the rolls. Press the top halves of the ciabatta rolls, pesto side down, onto the sandwich and secure with a sandwich pick. Serve warm.

Yield: 2 servings
Yum
0 Comments

Rainbow Chicken Salad Sandwich

3/7/2016

0 Comments

 
Picture
Imagine sitting down in the lunchroom and tucking into the tallest sandwich of your life, in front of ALL of your colleagues.

What.

You weren't inspired by the Sunday funnies where Dagwood Bumstead tossed everything from the fridge onto his classic towering sandwich? Of course, even Dagwood knew enough not to do that at work. He always pulled a very modest looking sandwich from his lunchbox, lovingly packed by his wife Blondie. But the home front was a different story. Particularly on the weekends, when good ol' Dag would eat himself into oblivion.

Home is like having a pet. It doesn't judge you. It's the one place where giant mouthfuls, eating with your hands and dropping food everywhere is perfectly acceptable. In my household, we jokingly say "man down" when one of us spills food all over the place, and contentedly continue stuffing our faces amidst the aftermath.

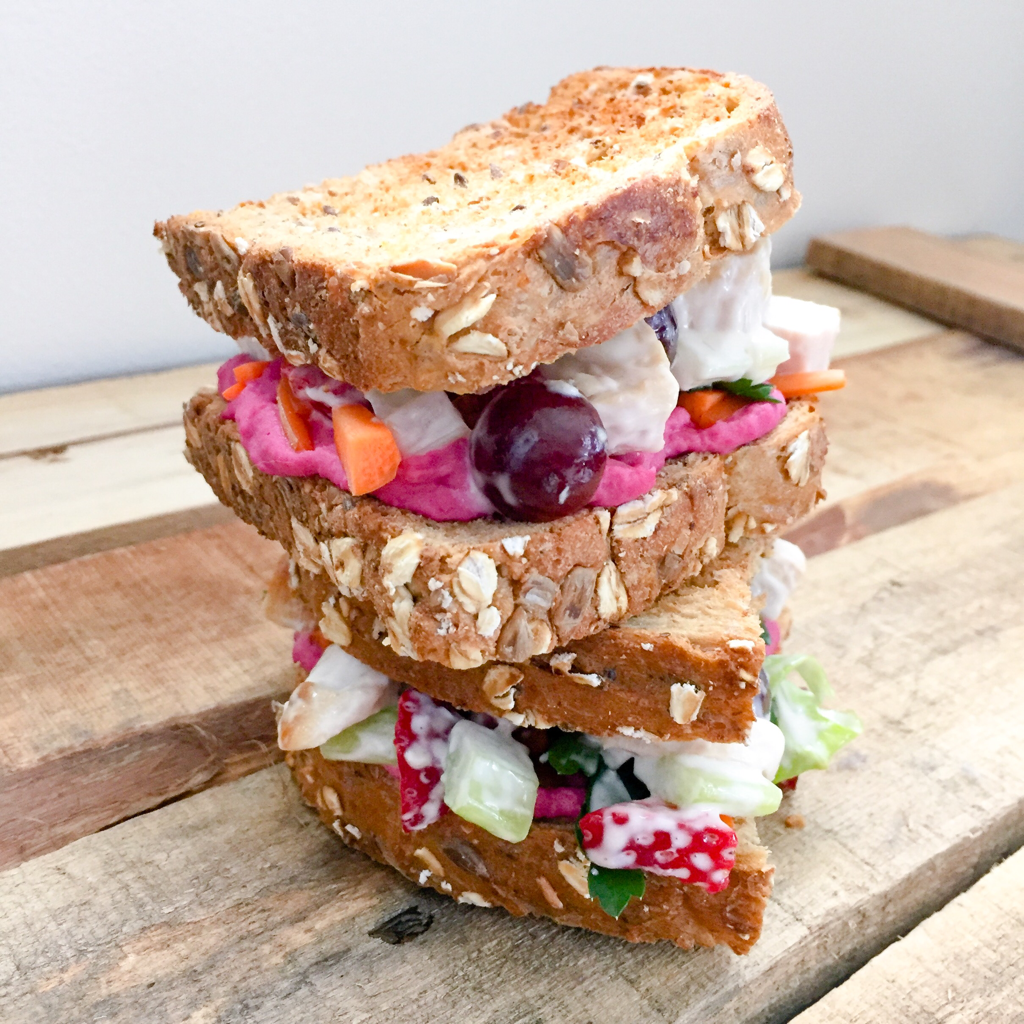
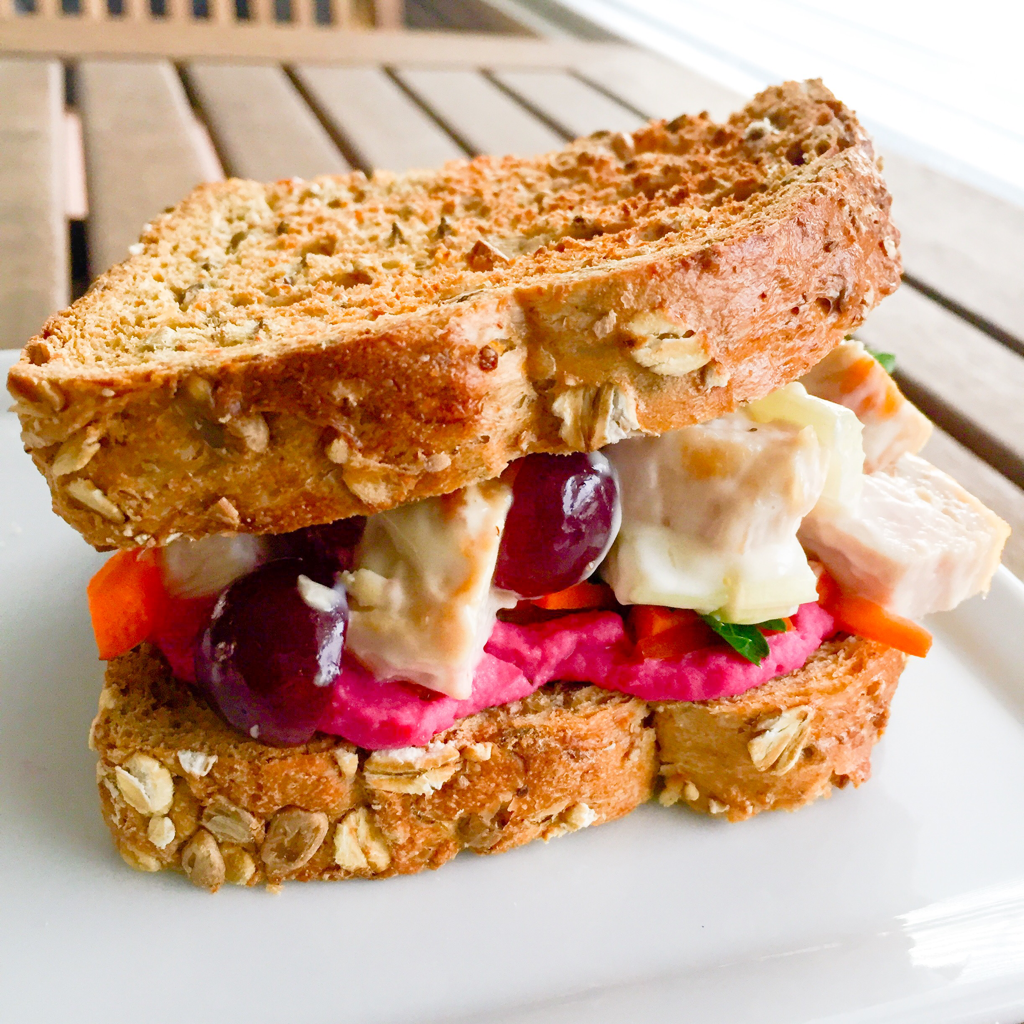
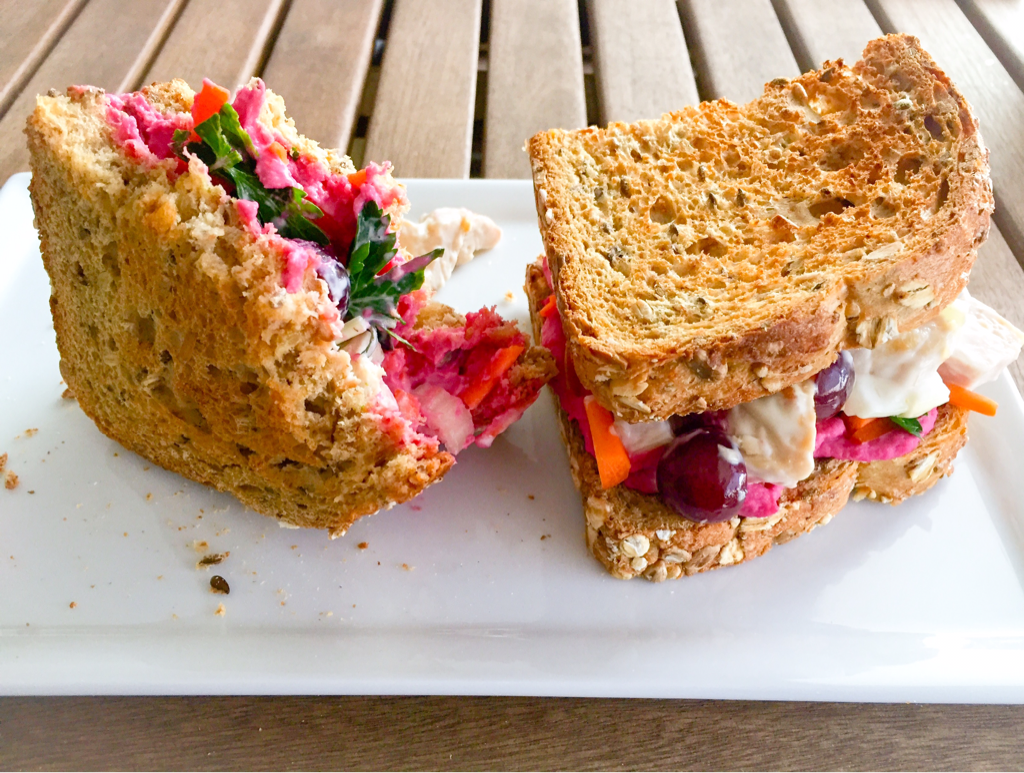
All that said, this sandwich has the potential to be incredibly messy. And a whole lot of fun. The mix of fresh fruits, herbs and vegetables are light and refreshing. And for the occasional cook who still wants to eat well, it doesn't require much in the way of cooking. 

It is highly recommended that this sandwich be eaten at home. Or if you must take it to work, eaten in carefully portioned halves with a knife and fork at the ready to clean up any messy escapees. Lest your colleagues sweetly nickname you Templeton. Or worse yet, your boss walks in just as you take that enormous bite, in which case you'll be in heaven and it won't matter a bit. 
Picture
Picture
Ingredients:
4 small cooked chicken breasts, diced
1/2 cup celery, chopped
1/2 cup grapes, halved
1/2 cup strawberries, chopped
1/2 cup Veganaise or Hellman's Mayonnaise
1 tablespoon lemon juice
8 slices whole grain bread, lightly toasted
1/2 cup store-bought beetroot hummus

2 carrots, shredded
1 large handful flat leaf parsley

Directions:
Combine the chicken, celery, grapes, strawberries, Veganaise and lemon juice in a bowl and set aside. Arrange the bottom bread slices on a cutting board. Spread the hummus evenly over the bread, layer with carrots and parsley, then top with a big scoop of chicken salad. Press the remaining bread tops over the chicken salad and cut the sandwiches into halves. Stack two sandwich halves on each plate, securing with a wooden skewer all the way through the center if need be, and serve.

Yield: 4 servings
Yum
0 Comments

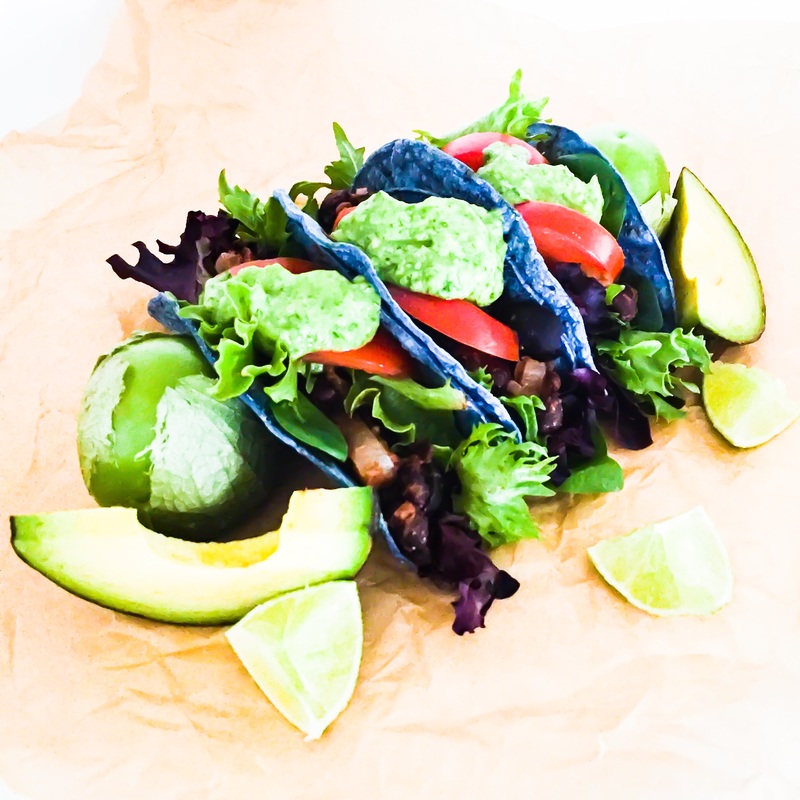
Blue Corn Tacos with Beans & Avocado-Tomatillo Sauce

1/21/2016

0 Comments

 
Picture
Picture
If there were one food I might be in danger of turning into, well...actually it would be a coffee bean. But second to that would be a taco. It's always my answer whenever my husband asks what I'm in the mood to eat. (He would be a pizza just in case you were wondering.) Whether it's a fried fish taco on Cape Cod, a freshly made bean and cotija cheese taco from Puerto Vallarta or Steak Tacos al Carbon from my favorite Mexican restaurant, I'll try them all. 

At home, I prefer to go a little lighter. This recipe is stuffed with veggies and contains no meat or cheese. Grilled fish, London broil or chicken would also pair nicely with the sauce. If you must include cheese, I would choose crumbly cotija, if you can find it.

Tomatillos, if you've never had them, are citrusy in flavor and texturally similar to a green tomato. After combining all of the ingredients for the sauce, the end result should be creamy, tangy, and a touch salty - not watery and flavorless. If you achieve the latter, try adding an avocado, salt and a bit more citrus juice. Also, the best taco seasoning to use is one that you like. Sometimes I will toss in a homemade version, other times I'll go with a store bought package, so long as it doesn't contain msg or preservatives. Anything goes. Finally, if you can't locate blue corn tortillas, the regular corn or flour variety will do just fine. Disfrute de su comida! (Enjoy your meal!)


Ingredients:
6-8 blue corn 6" tortillas
2 tablespoons olive oil
1 yellow onion, chopped
1 can black beans, rinsed
5 tablespoons taco seasoning
1 1/2 cups of water
3 ounces black pitted olives, halved

1 large avocado, halved and pitted
2 medium tomatillos
1 cup cilantro, rinsed well
juice of 1 lime or 1/2 lemon
salt and black pepper to taste
1 handful mixed greens
1 medium tomato, seeded and chopped

Directions:
Heat a fry pan over medium heat. One-by-one, toast each side of the tortillas until lightly browned. Fold in half and place the tortilla taco shells on a plate to cool.

Add the oil to the warm fry pan and stir in the onion. Cook until softened and lightly browned. Add the black beans, taco seasoning and water. Continue cooking until the water is absorbed. Remove from heat, stir in the olives and set aside.

In a blender or food processor, puree the avocado flesh, tomatillos, cilantro, citrus juice, salt and pepper. Set aside.

Divide the greens between the taco shells, then layer on the bean mixture and tomato. Top with a dollop of avocado sauce and serve immediately.

Yield: 3-4 servings
Yum
0 Comments

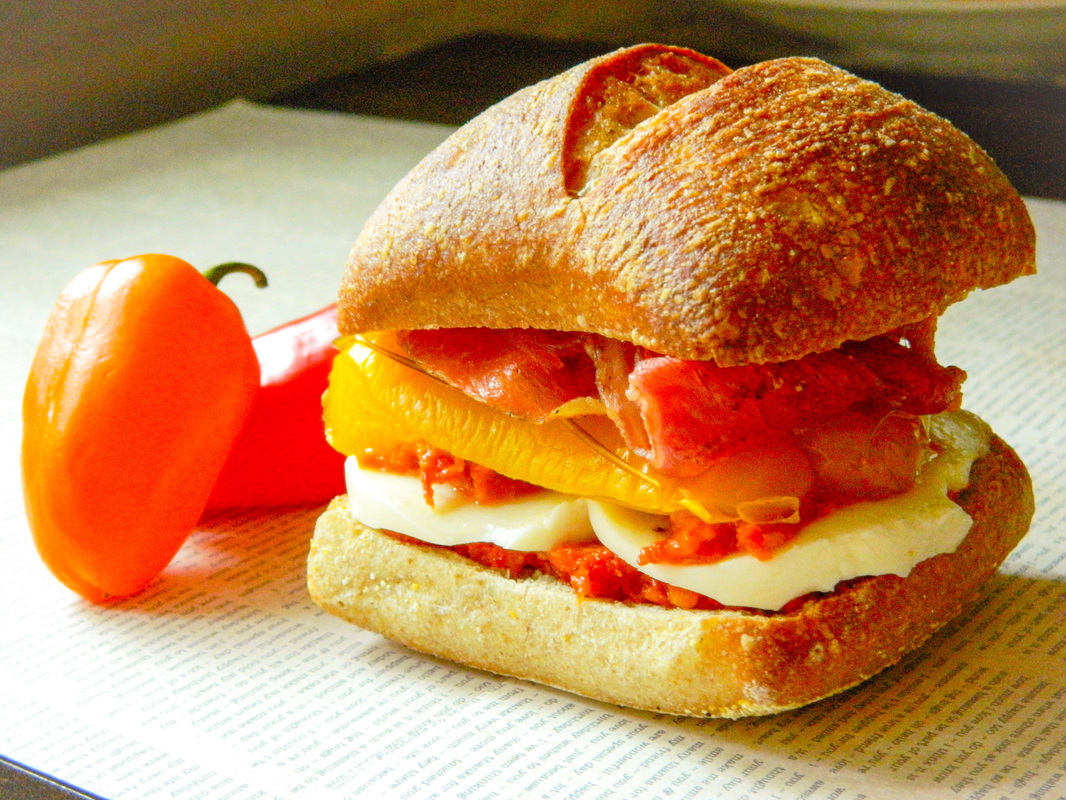
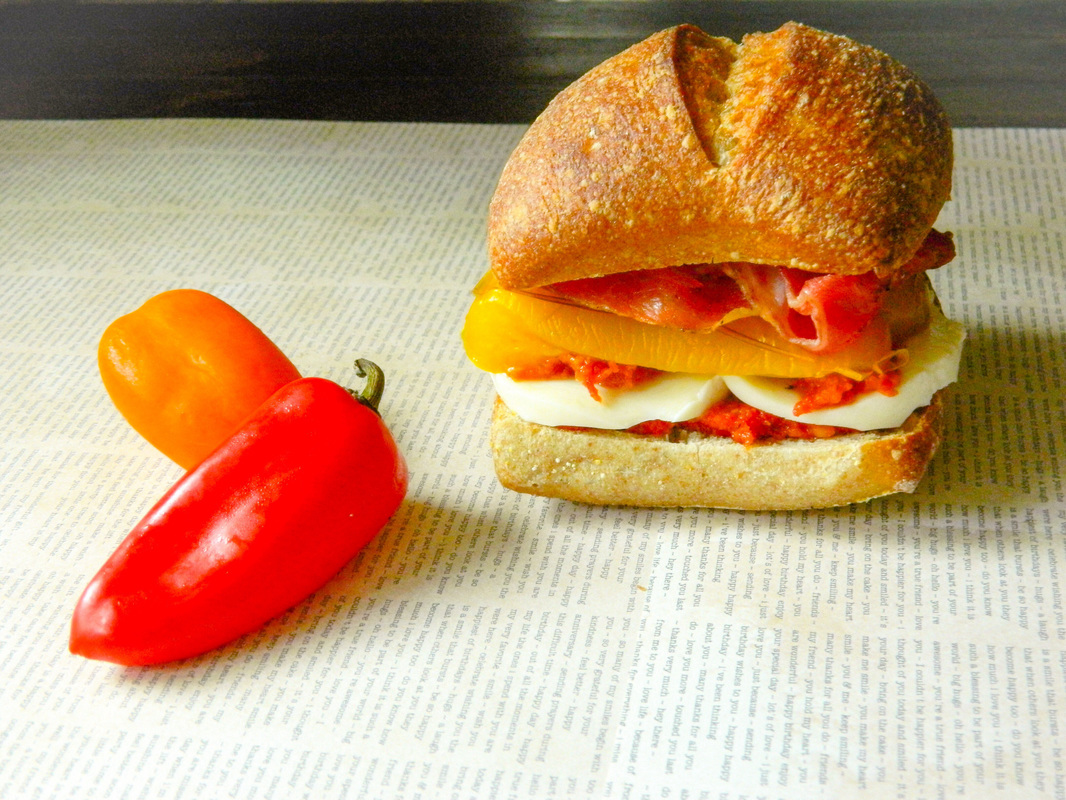
Prosciutto & Sun-Dried Tomato Pesto Sandwiches

7/22/2015

0 Comments

 
Picture
Just about every deli in New York offers a breakfast sandwich with eggs, but few without. This can be difficult for people who want a simple meal, but are highly allergic to or just plain dislike eggs. My husband falls into the latter category, so instead, he'll ask for a bacon sandwich with cheese and ketchup. Not too complicated, in theory. In reality, it's a huge hassle. Most deli clerks react with confusion, while others are irritated at being asked for a "special" sandwich. Typically, the end result is two tiny pieces of bacon slapped together on a bun with a slice of cheese and a squeeze of ketchup. If asked for more bacon, they charge an extra fee, and my husband will be lucky to receive much more than what was originally there in the first place. 

Being overcharged for an artery clogging breakfast and left hungry afterward isn't my idea of a quality meal. Less greasy than bacon, prosciutto is easier to digest. Not to imply that prosciutto is a healthy alternative to bacon. It contains its fair share of fat and sodium. However, because it is sliced thin, I can stack a normal portion into the illusion of a larger serving size. We eat with our eyes after all. Then I'll pair the sandwich with a piece of fruit or freshly squeezed juice to round it out.

Whether your palette is simple, classic or gourmet, try this prosciutto sandwich for a satisfying way to enjoy a Sunday brunch or picnic. 
Picture
Ingredients:

Sundried Tomato Pesto:
7-10 ounce jar sun-dried tomatoes in extra virgin olive oil
1 tablespoon lemon juice
3 garlic cloves
1/4 cup slivered almonds
1 small bell pepper
1 small handful fresh basil or baby spinach leaves
1/4 cup parmesan cheese

8 slices prosciutto, sliced thin and separated
4 soft rolls
4 slices mozzarella cheese
1 large grilled bell pepper, quartered

Directions:
Pour the jar of tomatoes, along with all of the oil, into a food processor or blender. Add the lemon juice, garlic, almonds and pepper. Blend into a smooth puree. Then add the basil or spinach leaves, continuing to blend before adding the cheese. Use a rubber spatula to scrape the pesto back into the leftover tomato jar and set aside.

Place each slice of prosciutto into a large-size skillet. Cook on medium-high until both sides of the prosciutto slices are browned, about 2 minutes per side.  Slice the rolls in half and toast under a broiler until golden brown. Remove from heat. Spread a spoonful of the pesto onto the bottom of each roll. Add the cheese and return to the broiler until cheese is slightly melted. Remove from broiler and top with another spoonful of pesto. Add a layer of pepper and prosciutto, covering with the bread tops. Serve with juice or fresh fruit. Cover and refrigerate any leftover pesto for up to 7-10 days.

Yield: 4 servings
Yum
0 Comments
    Fitness Training:
    Located in the Hudson Valley or Westchester NY? Contact me for a trial in-home fitness training session!

    Author

    Sarah Inglis is a increasingly vegetarian non-vegetarian, as well as a certified fitness trainer, personal chef, freelance writer and food photographer with degrees in media communications and dietetics. This blog is a collection of healthy recipes, along with a bit of fitness & nutritional information.

    Links

    Affiliate links to products I use and think are great are posted on this site. This means I receive a small commission if you purchase a product through these links, though at no extra cost to you. This is both to cover costs for the blog and to provide helpful tools to the reader. Thank you for supporting Embody Fitness & Nutrition!

    Categories

    All
    Appetizers
    Breakfast
    Burgers/Sandwiches/Tacos
    Desserts
    Entrees
    Fitness Info
    Juice Recipes
    Nutritional Info
    Salad
    Sides
    Snacks
    Soup
    Toppings
    Travel

    Archives

    January 2018
    December 2017
    September 2017
    August 2017
    July 2017
    June 2017
    May 2017
    April 2017
    March 2017
    February 2017
    January 2017
    December 2016
    November 2016
    October 2016
    September 2016
    August 2016
    June 2016
    May 2016
    April 2016
    March 2016
    February 2016
    January 2016
    December 2015
    November 2015
    October 2015
    September 2015
    July 2015
    June 2015
    May 2015
    April 2015
    March 2015

    RSS Feed

© 2015-2018 Embody Fitness & Nutrition. All rights reserved. No content or images may be reproduced in any part or form without written permission.
Proudly powered by Weebly