Embody Fitness & Nutrition
  • Blog
  • Recipe Index
  • Cooking Videos
  • About Me
    • Additional FAQ's
    • Published Work
  • Contact

Piña Colada Chia Pudding with Guava Sauce

8/31/2016

0 Comments

 
Picture
{This is not a sponsored post. All product recommendations are based on my own personal use and opinion of these products, and are meant simply as a guide to the reader.}

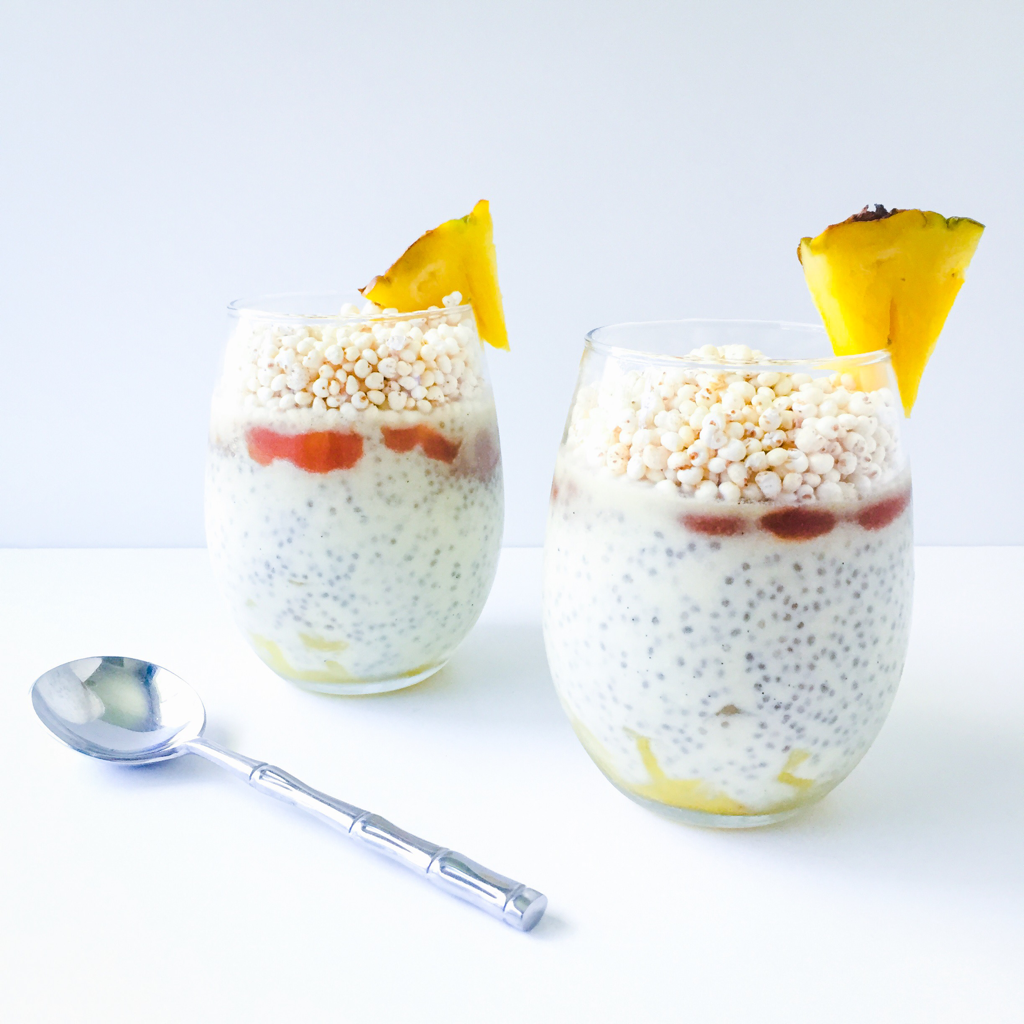
Today's recipe showcases a new ingredient: guava paste!

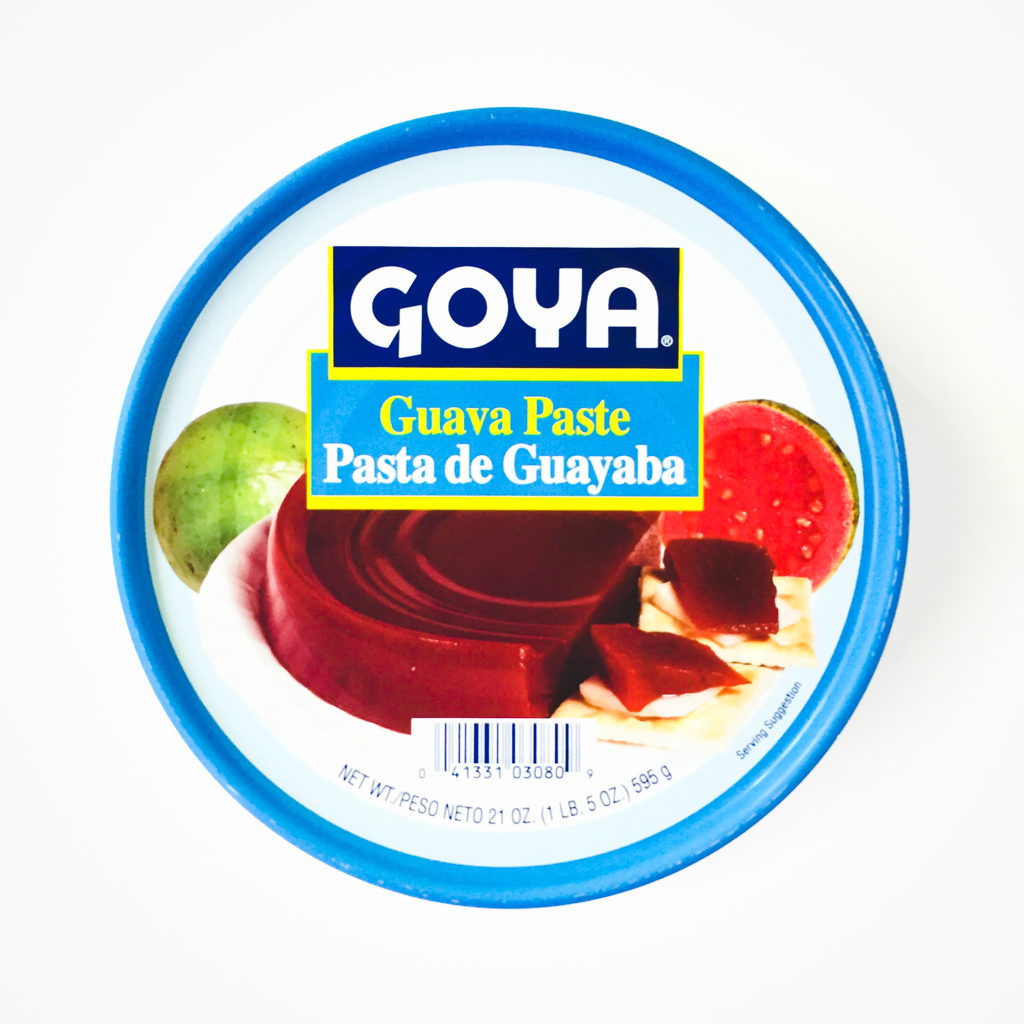
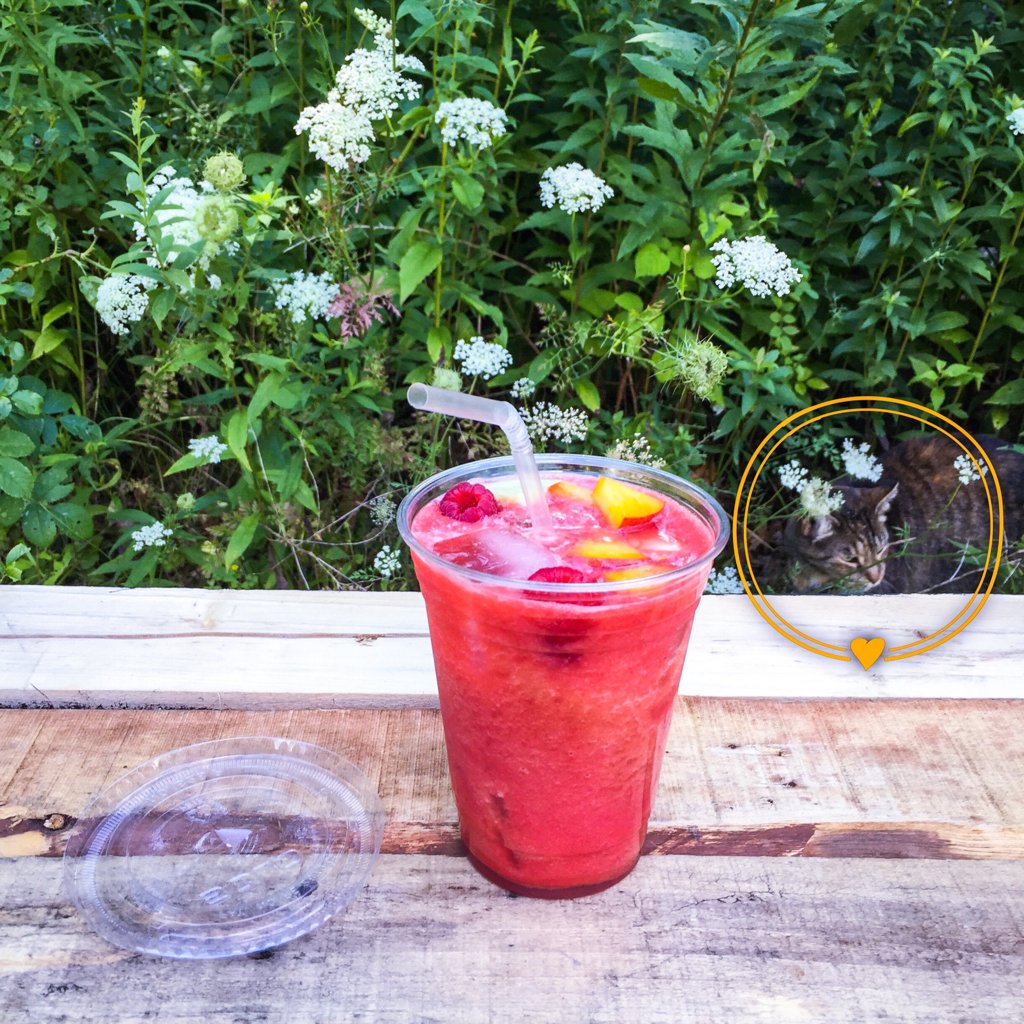
Guava paste can be made at home by slow cooking equal parts sugar and diced guava. The faster, and only available option in my area at this time of year, is the canned store bought variety. Goya Foods Brand Guava Paste, packaged in a flat tin and available in many grocery chains, is featured in this recipe. Most often guava paste is paired with cheese or incorporated into baked goods. The flavor is reminiscent of a fruit roll-up in jelly form, adding the perfect balance of sweetness when combined with other tropical ingredients.

​The next layer in this dessert is a simple mix of chia seeds, vanilla paste, pineapple and So Delicious Lite Culinary Coconut Milk which comes conveniently packaged in single use cartons. Not to be confused with canned coconut milk, lite culinary coconut milk is both lower in fat and the consistency of pourable cow's milk.

This is a make ahead dessert that is worth the wait. Be sure to allow plenty of time for it to set before adding the guava sauce. With this last step work quickly! Melted guava paste prefers its original form, returning to it within minutes. Finally, search your pantries for some crunch, top it off and enjoy!
Picture
Ingredients:
1 cup cubed pineapple, plus 1/4 cup reserved
11 ounces So Delicious lite culinary coconut milk
1 tablespoon vanilla paste or powder
2 tablespoons chia seeds
3 tablespoons water
4-6 tablespoons Goya guava paste
1/4 cup puffed millet or granola

Directions:
Blend the pineapple, milk and vanilla until smooth. Pour into a liquid measuring cup and stir in the chia seeds. Allow to thicken for 15 minutes.

Cut the reserved pineapple into small cubes and spoon into the bottom of the serving glasses. Equally divide the thickened chia mixture between the two glasses. Refrigerate overnight.

Over medium-high heat, combine the water and guava paste in a small pan. When the paste begins to heat up, use a whisk to break it apart. Turn the heat down to medium and continue whisking until smooth. Remove from heat, allowing to cool just slightly for about 1-minute. Quickly pour or pipe the sauce onto the chilled chia pudding to form a thin top layer, dividing equally between each glass. Refrigerate for at least 1 hour.

When ready to serve, top with puffed millet or granola of choice.

Yield: 2 servings

Products Used With The Recipe:
Yum
0 Comments

Baked Eggplant Ball Casserole

8/26/2016

0 Comments

 
Picture
My Italian grandmother makes a mean meatball. Getting her to share an actual recipe, any recipe, is extraordinarily difficult. Every attempt to find out her secret is met with the same answer, "oh I just add this and this and a little of that." Sigh... Whatever it is that she tosses in there, I can never quite get it right. 

Fortunately, my father-in-law is an Italian-American from Yonkers, New York who enjoys sharing everything he knows with anyone who will listen. In the kitchen, the one thing he knows really well is how to make a great meatball. Thanks to him, I now understand what has been missing from mine. In my search, I have read tons of recipes and they all lack this key ingredient, as evidenced by the commenters complaining on lack of flavor. That ingredient is...ketchup. Not tomato sauce, not tomato paste. Ketchup. Surprised? Me too. What Italian uses ketchup? But it works. 

​This recipe is an adaptation of my father-in-law's version, which calls for ground beef. I tend to make mine with lean ground turkey, especially in the warmer months when I want something lighter on the stomach. But some days I just want to be completely meat free, and this dish is a good stand-in.

Included in the ingredient list are substitutions to accommodate vegetarians, vegans and those with gluten intolerance. The most labor intensive part of this dish is grating the eggplant, but well worth the effort to achieve a meatball-like texture that holds together.

Buon appetito! And as my grandmother would say, "mangia, mangia before it gets cold!"
Picture
Picture
Ingredients:
1 medium eggplant, peeled and shredded
Kosher salt
1 tablespoon oregano
1 tablespoon parsley
2 garlic cloves, minced
​2 tablespoons ketchup
1/4 cup regular or vegan Parmesan cheese
1/2 cup regular or gluten-free seasoned breadcrumbs, plus 3/4 cup reserved
1 large egg + 1 tablespoon water or 1 tablespoon ground flax seed + 2-3 tablespoons water
extra virgin olive oil
2 cups tomato sauce
​1/2 cup shredded skim-milk or vegan mozzarella

Directions:
Shred half the eggplant with a cheese grater and place in a metal sieve perched over a bowl to catch any liquid. Sprinkle generously with salt and repeat the process with the remaining eggplant. Let stand for 15 minutes. Rinse well with water, lightly drain and transfer to a sauté pan. Cook over medium-high heat until softened. Remove from heat and transfer to a bowl to cool.

Stir in the oregano, parsley, garlic, ketchup, cheese and crumbs. Scoop out a small spoonful of the mixture and form into a ball. If it does not hold its shape, add breadcrumbs a little at a time to form a stiffer mix. Refrigerate for 30 minutes to an hour.

Pre-heat the oven to 400 degrees F. Pour the reserved breadcrumbs onto a plate. In a separate dish whisk the egg, or the flaxseed if using, with the water. Scoop out a small spoonful of the eggplant mixture and form into a ball. Coat with the egg or flaxseed dip, then the breadcrumbs. P
lace into a greased mini muffin pan and repeat until all of the mixture is gone.

Bake for 30 minutes, gently flipping the eggplant balls about halfway through the cook time with a metal spoon.

Meanwhile, coat the bottom of two mini casserole baking dishes with tomato sauce. Remove cooked eggplant balls from oven and transfer six to each dish. Top with remaining sauce and cheese. Place under a broiler for 4-5 minutes, or until cheese begins to bubble.

​Yield: 1 dozen mini eggplant balls
Yum
0 Comments

Italian Style BLT Sandwich

8/16/2016

1 Comment

 
Picture
Earlier this week, I found myself in a conversation about BLT sandwiches, one of my all-time favorites. 

In spite of my country farm beginnings, red meat is less prominent within my diet with each passing year. Yet every once in awhile, something as simple as a conversation will give me a hankering for it. But even when I crave a food like red meat, bread or mayonnaise, I try to make it as healthy as I can without sacrificing flavor. For example, in lieu of greasy bacon, prosciutto can be used more sparingly while still imparting a ton of satisfying flavor. A whole grain roll is the best bread option, but if one is unavailable, consider a white flour roll if the size is not much greater than a dinner roll, or if it contains nutrient rich seeds. There are also many heart healthy substitutions for mayonnaise on the market that taste just as good as the real thing. 

This twist on an old classic replaces bacon with a bit of prosciutto, includes an eggless pesto mayonnaise and a few store-bought ingredients to make life easier.

If you like this version, check out a similar post for a breakfast sandwich here: Prosciutto & Sun-Dried Tomato Pesto Sandwiches.
Picture
Picture
Ingredients:
4 ounces thinly sliced prosciutto
​2 soft whole grain or seeded ciabatta rolls, halved
4 romaine lettuce leaves, halved crosswise
1 tomato, thinly sliced
2 tablespoons Vegenaise or mayonnaise
2 tablespoons store-bought basil pesto


Directions:
In a non-stick fry pan, cook the prosciutto until both sides are browned. Remove from heat and drain on a paper towel.

Stack the lettuce, prosciutto and tomato onto the bottom halves of the rolls. Spread the Vegenaise and pesto over the cut side of the top halves of the rolls. Press the top halves of the ciabatta rolls, pesto side down, onto the sandwich and secure with a sandwich pick. Serve warm.

Yield: 2 servings
Yum
1 Comment

Roasted Beetroot Salad

8/13/2016

0 Comments

 
Picture
We are currently experiencing scorching heat here in upstate New York. All I want to do is sit in a pool with a big chunk of watermelon in one hand and an ice cream cone in the other. Alas, I possess neither pool nor watermelon, but I do have a stash of fresh veggies that need eating.

On a recent jaunt to Trader Joe's, I picked up a big bag of organic beets for not a lot of money. I roasted the entire batch on a cool morning, though only four were needed in this recipe. The rest will store in the fridge to be served alongside grilled meats and veggies or with some soft cheese. On the same shopping trip, I also found a bottle of white balsamic vinegar for just $2.99, perfect for the strawberry vinaigrette I had in mind to accompany this salad. White balsamic vinegar has less astringency in flavor than its darker cousin, pairing well with lighter foods like fruits, salads and fish.

​The rest of this salad is easy. Just quickly blanch the peas, tossing everything together for a refreshing afternoon meal.
Picture
Ingredients:

Salad:

4 beets, rinsed and destemmed
​2 cups baby spinach
1 small red onion, sliced thin
1 small zucchini, grilled and diced
1 large handful sugar snap peas
1/2 cup frozen peas
​1 handful sprouts
1/2 cup strawberry vinaigrette (recipe below)


Strawberry Vinaigrette:
​5 large fresh or thawed strawberries
1 tablespoon white balsamic vinegar
1/2 tablespoon fresh lemon juice
1 tablespoon honey
​1/4 cup extra virgin olive oil
Salt and black pepper to taste

Directions:
Pre-heat the oven to 375ºF. Place the beets on a foil lined pan and seal with additional foil. Bake for 1 & 1/2 hours or until softened. Remove from oven, allowing to cool before peeling away the skins.

Meanwhile, purée the strawberries, vinegar, lemon juice, honey and oil until smooth. Add salt and pepper to taste and set aside.

Bring a small pot of water to a boil. Blanch the peas by cooking for 2 minutes, then remove with a slotted spoon and immediately immerse in ice water to stop the cooking process.


Arrange the spinach, onion and zucchini on serving plates. Thinly slice the beets and place over the onions. Add the peas and sprouts. Drizzle with dressing when ready to serve.

Yield: 4 servings
Yum
0 Comments

Gluten-Free Double Chocolate Reward Cake

8/7/2016

0 Comments

 
Picture
For a number of weeks, this blog has endured neglect while I studied for my fitness certification renewal exam. As a treat to myself for passing, and for the readers who kept checking back despite my absence, I made this Double Chocolate Reward Cake.

​In keeping with the overall theme of the blog, there are healthy elements woven into this cake to help my readers eat smarter. Most notably, it is free of gluten and refined white flour. Also, there is a vegetable skulking about, but one commonly used in baking - zucchini.

And finally, the sugar content is intentionally low, but can be adjusted to taste. I want to really highlight this point, because people are often disappointed when they try a recipe only to find that the level of sweetness is not what they expected. Traditionally, zucchini breads (or cakes) contain a minimum of 1-2 cups of sugar. This version is semi-sweet, with only 3/4 of a cup of coconut sugar (or brown if you prefer), allowing the chocolate flavor to dominate. That said, for those with an extra sugary sweet tooth, I recommend increasing the sugar to one-and-one-half cups. The semi-sweet chocolate chips can also be swapped out for milk chocolate.

​Scharffen Berger natural unsweetened cocoa powder lends a rich chocolate note to this dessert. It can be found in the baking aisle of many major grocery chains, as well as on Amazon. Other cocoa powders can certainly be used in its place, but keep in mind that the acidity and flavor of the cocoa chosen will greatly affect the flavor of the cake.

Now for the most important element - to frost or not to frost? I am probably in the minority here, as I have never liked frosting all that much. As an alternative, cherry preserves or coconut ice cream are both nice accompaniments. A bit of cream cheese or a dusting of powdered sugar also work well. 

As for me, I like mine plain served alongside a large cappuccino. 
Picture
Picture
Picture
Ingredients:
1 cup buttermilk or 1 tablespoon lemon juice stirred into 1 cup unsweetened almond milk
2 tablespoons melted coconut oil
2 large eggs
2 cups zucchini, shredded and lightly squeezed of excess liquid

1 & 1/2 cups gluten free oat flour
3/4 cup gluten free almond meal/flour
3/4 cup coconut or brown sugar
1 teaspoon baking soda
1 teaspoon baking powder
​1/4 cup Scharffen Berger natural unsweetened cocoa powder

1/2 teaspoon nutmeg
1 teaspoon cinnamon
3/4 cup dark or semi-sweet chocolate chips


Directions:
Pre-heat oven to 350ºF.

In a mixing bowl, whisk together the milk, oil, eggs and zucchini. Set aside. Sift the dry ingredients into a separate mixing bowl and gently fold in the chocolate chips. Using a rubber spatula, stir the wet mixture into the dry ingredients until a batter forms. 

Pour the batter into a non-stick or lightly greased standard loaf pan. Bake for 50-55 minutes if using a metal or dark non-stick pan, 45-50 minutes if using glass, or until a toothpick comes out semi-clean. Remove from the oven, allowing to cool for 15 minutes before releasing from the pan. Place on a cooling rack for another 10-15 minutes.

Wrap well and store at room temperature in moderate to cool climates. Refrigerate in hotter climates.


​Yield: 8 slices
0 Comments

Peachberry Refresher

8/2/2016

0 Comments

 
Picture
Who doesn't love fresh pressed juice on a hot summer day? Particularly one packed full with vitamins and minerals, antioxidants and a vegetable derived diuretic to help reduce bloating.

To achieve the best flavor, ensure that the peaches are nice and ripe. The fruit should be fragrant with flesh that yields when lightly pressed.

Kirby cucumbers are typically small to begin with, and it might be tempting to add the entire thing. But too much can overpower the fruit. In this case a little goes a long way.

Some high speed juicers refuse to play nice with soft berries, flinging the fruit into the pulp bucket without extracting a drop of juice. If this describes your machine, add the raspberries to a blender. Pour the juice from the peaches and cucumber over the raspberries and blend until smooth. Then press through a sieve to remove the seeds prior to serving - preferably by the pool with a really good end-of-summer book!

(Psst! Check back next week for my Double Chocolate Reward Cake!)
Picture
Picture
Center Right: Keyboard-The-Photobombing-Kitty arrives during test shooting.

Ingredients:
3 medium ripe peaches, halved and pitted
1/2 Kirby cucumber
​1 pint fresh raspberries
ice cubes
garnish: fresh raspberries, peach and cucumber slices

Directions:
Run the peaches, cucumber and raspberries through a juicer. Fill a glass with ice. Pour the juice over the ice and add the garnish. Serve immediately.

Yield: 1 serving of juice
Yum
0 Comments
    Fitness Training:
    Located in the Hudson Valley or Westchester NY? Contact me for a trial in-home fitness training session!

    Author

    Sarah Inglis is a increasingly vegetarian non-vegetarian, as well as a certified fitness trainer, personal chef, freelance writer and food photographer with degrees in media communications and dietetics. This blog is a collection of healthy recipes, along with a bit of fitness & nutritional information.

    Links

    Affiliate links to products I use and think are great are posted on this site. This means I receive a small commission if you purchase a product through these links, though at no extra cost to you. This is both to cover costs for the blog and to provide helpful tools to the reader. Thank you for supporting Embody Fitness & Nutrition!

    Categories

    All
    Appetizers
    Breakfast
    Burgers/Sandwiches/Tacos
    Desserts
    Entrees
    Fitness Info
    Juice Recipes
    Nutritional Info
    Salad
    Sides
    Snacks
    Soup
    Toppings
    Travel

    Archives

    January 2018
    December 2017
    September 2017
    August 2017
    July 2017
    June 2017
    May 2017
    April 2017
    March 2017
    February 2017
    January 2017
    December 2016
    November 2016
    October 2016
    September 2016
    August 2016
    June 2016
    May 2016
    April 2016
    March 2016
    February 2016
    January 2016
    December 2015
    November 2015
    October 2015
    September 2015
    July 2015
    June 2015
    May 2015
    April 2015
    March 2015

    RSS Feed

© 2015-2018 Embody Fitness & Nutrition. All rights reserved. No content or images may be reproduced in any part or form without written permission.
Proudly powered by Weebly