Embody Fitness & Nutrition
  • Blog
  • Recipe Index
  • Cooking Videos
  • About Me
    • Additional FAQ's
    • Published Work
  • Contact

Prickly Pear Limeade Popsicles

7/21/2017

0 Comments

 
Picture
Ever tasted a prickly pear? Me neither. Not until recently. Even during my three trips to Mexico, where prickly pears (called nopales in Spanish) are all over the place, it never occurred to me to try one.

Prickly pears really are part of a cactus plant. They come in a rainbow of colors from orange, yellow and green to fuchsia and even red. The exterior is a bit unappealing, as one might expect from a cactus fruit, and the skin is inedible. The seeds within the fruit will break a tooth, and are best extracted. 

From a nutritional standpoint, prickly pears are loaded with Vitamin C, magnesium, potassium, B-vitamins, calcium, copper and antioxidant compounds.


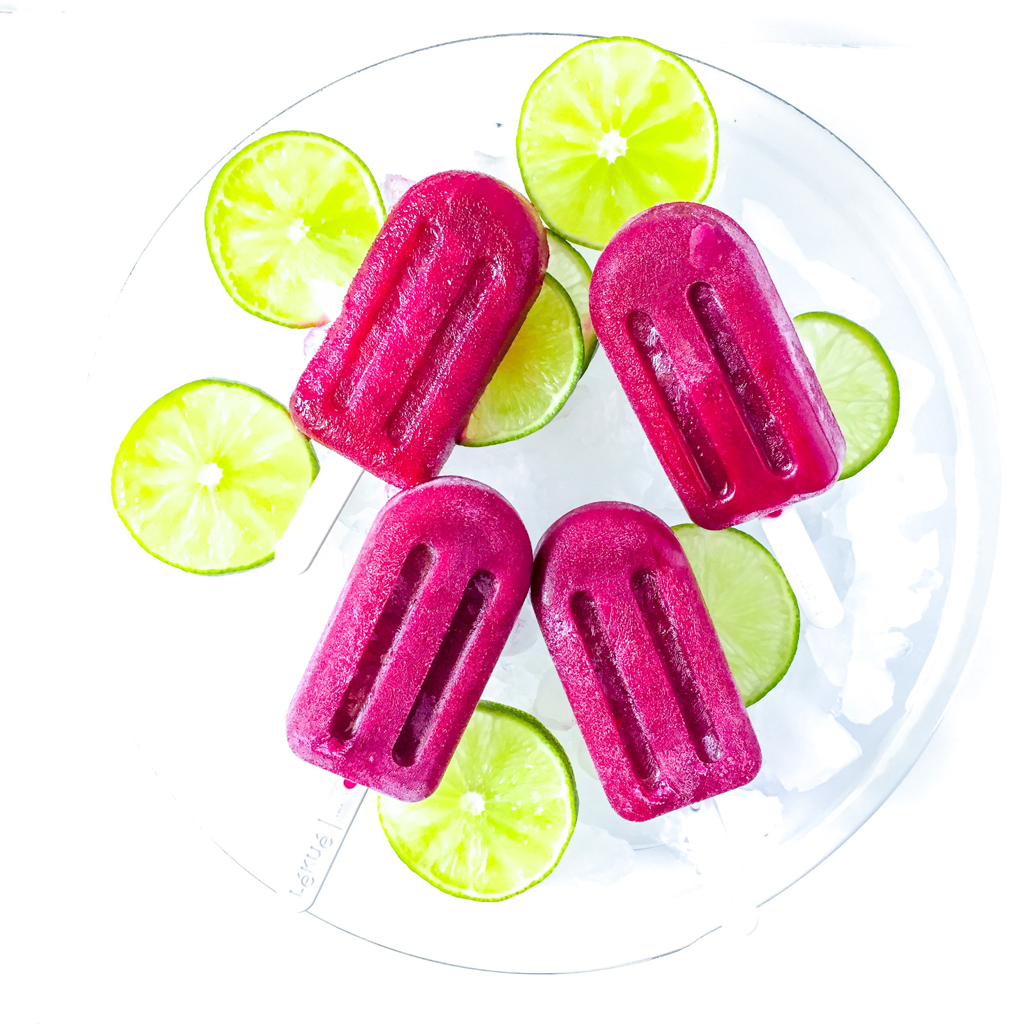
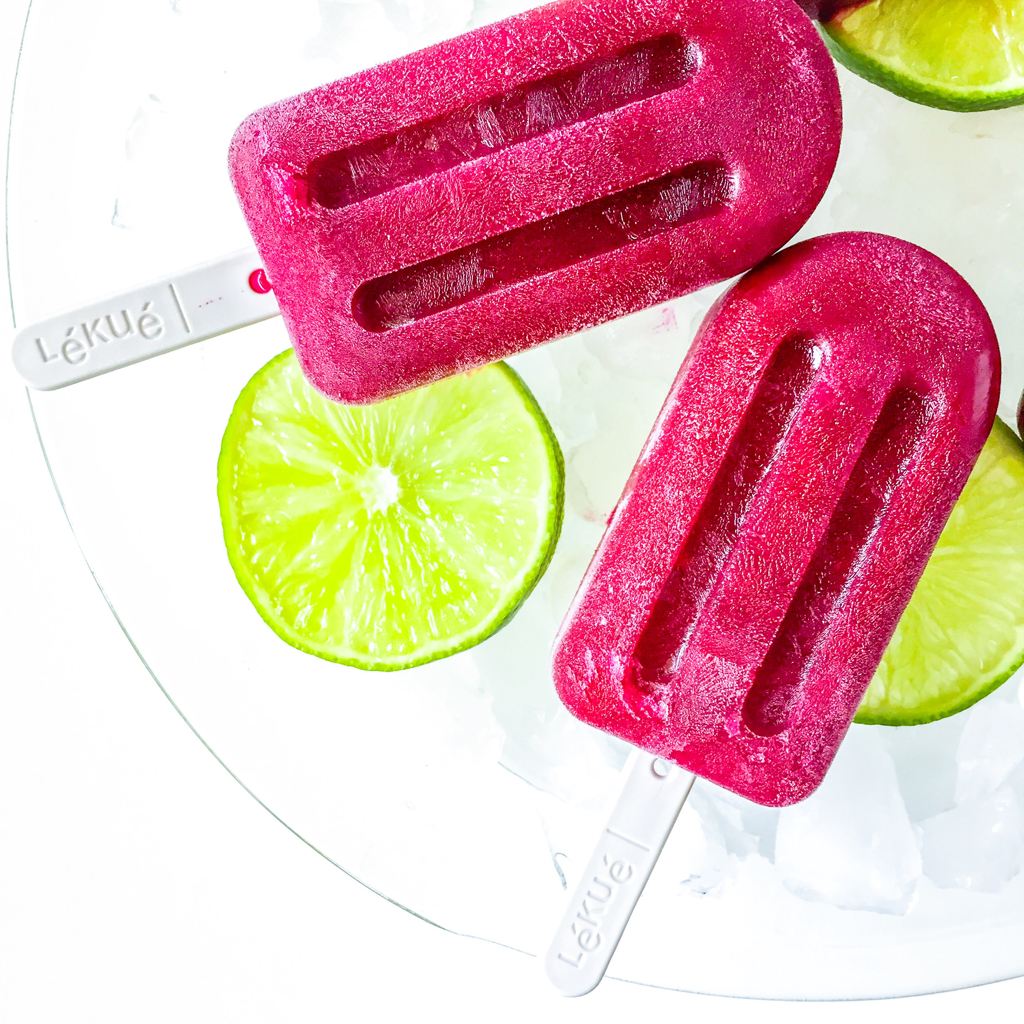
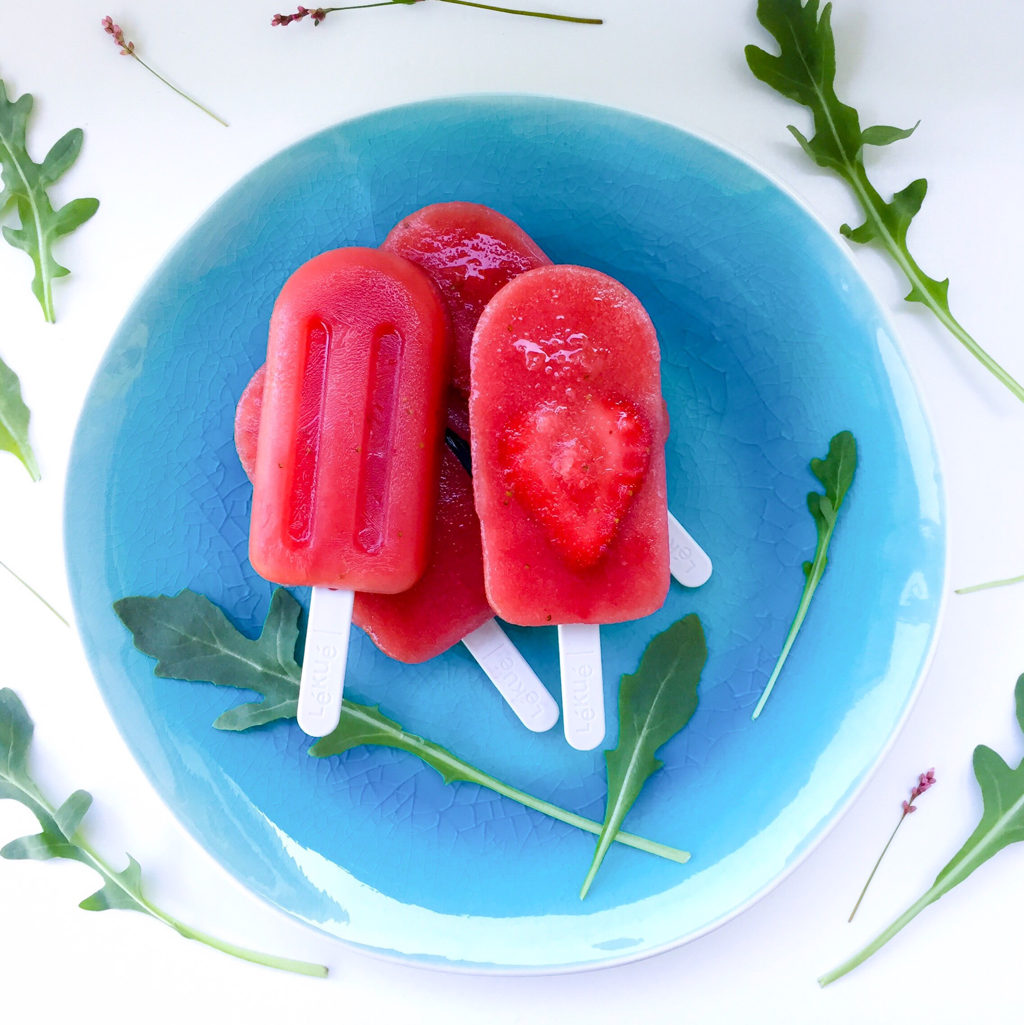
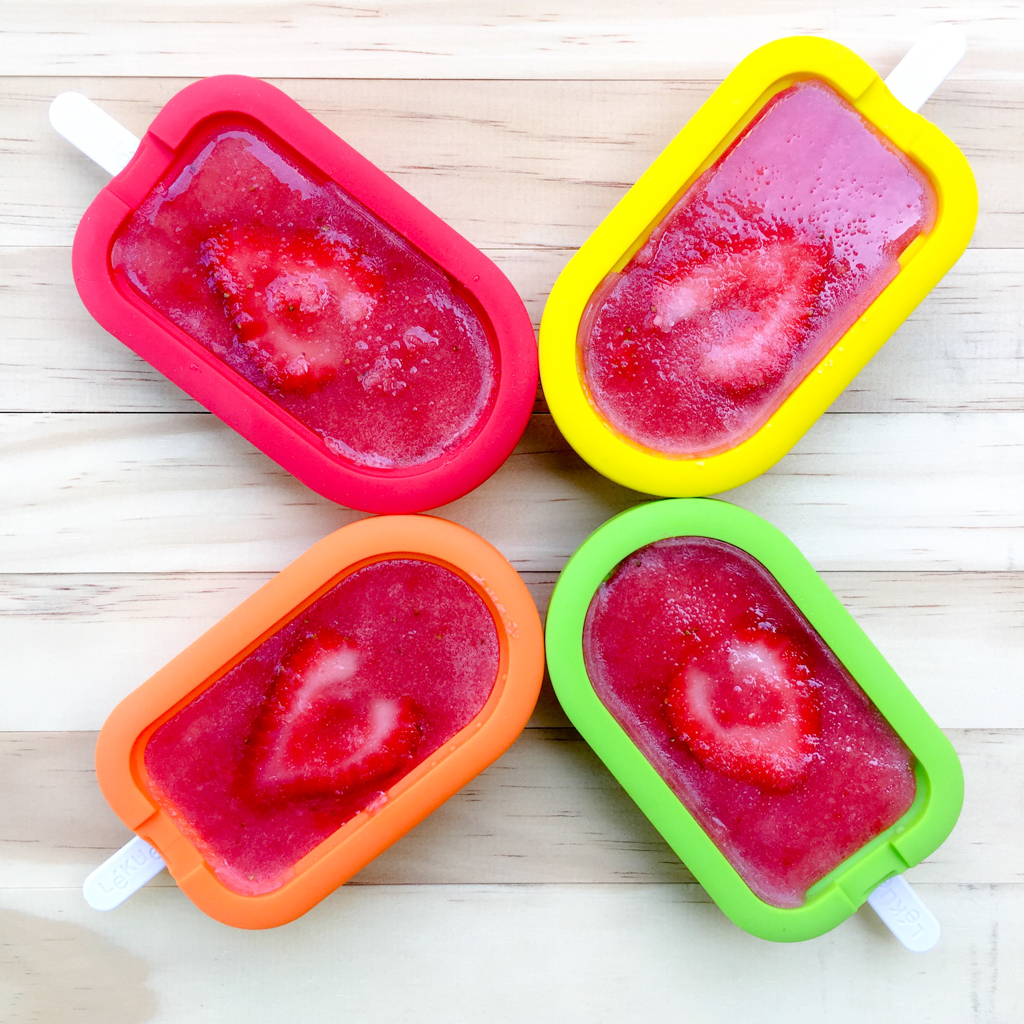
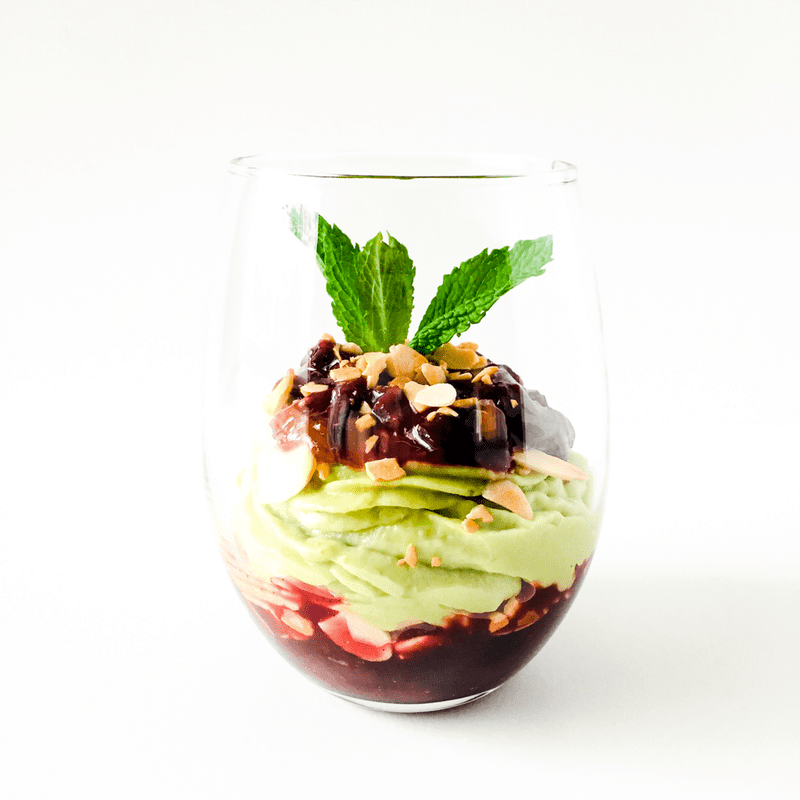
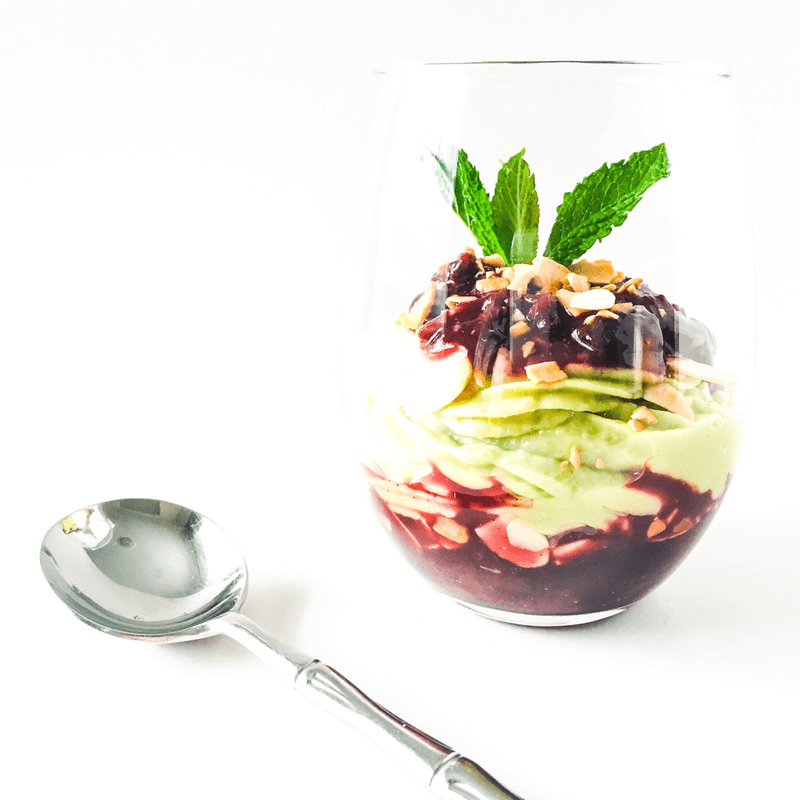
When I finally got around to eating a prickly pear for the first time, I was filled with uncertainty over how I could make it work in a recipe. The color was fantastic, just look at that deep pink hue in the photos. But it was like eating a sweet beet. And I like beets! But this was...earthy. Not the flavor I normally look for in a dessert, or a fruit for that matter! Hoping to balance that earthiness, I tried heightening the sweetness factor. I achieved the best results when using orange and lime juices combined with raspberries. Simple syrup in place of the orange juice and other berry varieties also work well.

Even with these added ingredients, the unique prickly pear flavor is distinct, particularly on the first bite. But in a "hmm, this is interesting" kind of way. After the second and third bites, the flavors blend a bit more and you wind up thinking "wow, this is really good!"

If you have yet to try a prickly pear yourself, I encourage you to pick a few up. They are available in both North and Latin America. Summer (now!) is your best bet for locating them in the States. 
​
{Follow me on Instagram for more healthy recipe inspiration!}
Picture
Ingredients:

Popsicles:
3 medium size prickly pears
3/4 cup fresh berries of choice
juice of 1 lime
1/2 cup orange juice or 1/2 cup simple syrup**

**Simple Syrup:
1/2 cup water

1/2 cup granulated sugar

Directions:
Add the water and sugar to a saucepan and bring to a boil over medium-high heat, stirring until the sugar dissolves. Remove from heat and allow the syrup to cool. 

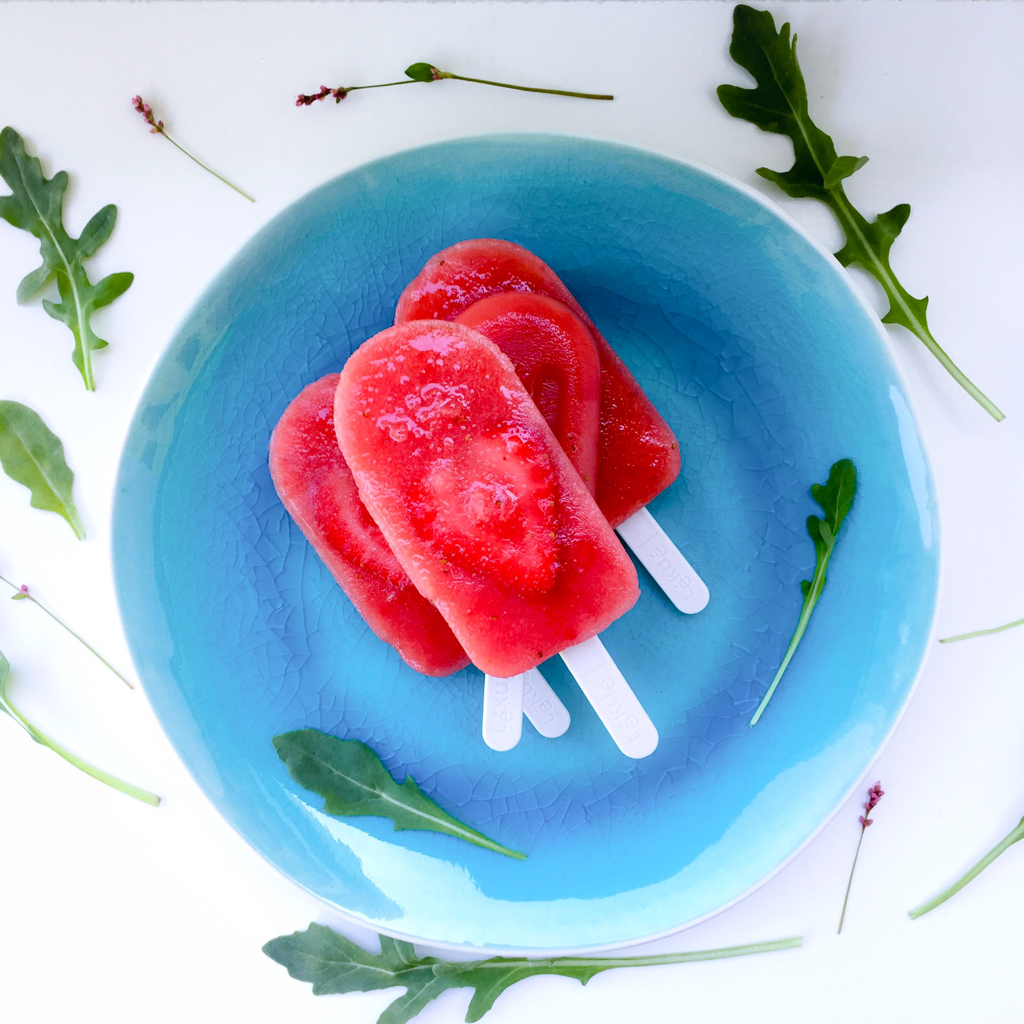
Slice off both ends of the pears, then cut each pear in half. Peel the skin off of each halve and place the pulp in a blender. Add the berries. Puree until smooth, then pour into a mesh sieve lined bowl. Use the back of a spoon to stir and press the pulp through the sieve. Stir in the lime and orange juices, or simple syrup if using. Pour into the popsicle molds, freezing for at least 2 hours.

Yield: 4-6 popsicles
Pin It
0 Comments

Strawberry Watermelon Sorbet Pops

6/15/2017

0 Comments

 
Picture
A slice of summer has finally arrived!

Over the last few days the air has turned hot and heavy with moisture. My fitness clients have been doggedly trudging through their workouts despite the heat - drenched almost to the tips of their ponytails by the end.

In this weather, anyone with a diet not on point is quickly revealed - heat tends to cause extra water retention and bloating. In just 1-3 days, a person who enjoys a few too many processed foods or late night snacks becomes visibly pudgier around their mid-section, as the temperature rises. For a trainer, this is useful information because it tells me when a person is in need of some gentle nutritional nudging.

Personally I crave, and therefore choose, watery fresh fruit over processed crap when it's hot. I suggest others do the same, but I often hear that fruit does not do enough to satisfy their sweet tooth. This is where turning it into a simple frozen dessert can help.

Smoothies blended with frozen fruits, plus a 1:1 ratio of coconut water and orange juice for a bit of sweetness, can hit the spot. Another trick is to blend frozen fruits with unsweetened nut or soy milk and a tablespoon of jam for that extra sweet kick.

Fresh fruits can be turned into sorbet-like popsicles. With watery fruits like melon and berries, the trick to preventing a solid "rock-sicle" effect, is to add a small amount of simple syrup. This ingredient is generally not necessary when using pulpy fruits such as mango, pineapple or bananas, which also have higher concentrations of sugar.

To kick off the season and motivate you all to start making your own healthy treats, I'm posting a very basic recipe. No veggies, herbs or strange ingredients in today's post.

If popsicle molds are not among your kitchen gadgets, just pour the purée into freezable serving glasses or a container. When ready to use, allow it to sit for a minute at room temperature before scooping it out.
​
​Go ahead and bookmark this recipe! The next time you find yourself suffering from a post indulgence puffy tummy, toss out the ice cream and any other junk food you have stashed - literally throw it in the garbage - and make this instead!

{Follow me on Instagram for more healthy recipe inspiration!}
Picture
Picture
Ingredients:
1/2 cup granulated sugar
1/2 cup water
1 heaping cup cubed watermelon
1/2 cup chopped strawberries
​fresh sliced strawberries for garnish, optional*

Directions:
Pour the sugar and water into a saucepan. Bring to a boil and stir until the sugar dissolves, to make a simple syrup. Remove from heat and set aside to cool. This makes about 2/3 of a cup.

In a blender, add the watermelon, strawberries and 1/2 cup of the simple syrup. Purée until smooth and refrigerate any leftover syrup in an airtight container for future use. Pour the purée into popsicle molds, garnish with a thin slice of fresh strawberry and freeze for at least 2 hours.

​Yield: 6-8 popsicles
Pin It
0 Comments

Chewy Chocolate Peanut Butter Bars

6/11/2017

0 Comments

 
Picture
If a Crappy-Wife-of-the-Year award exists, I just qualified.

My husband, who has an extra long sweet tooth, rarely complains when he opens his lunch cooler to find only a sandwich, apple and a yogurt. Even though we both know a homemade brownie or even a piece of chocolate would make his day much happier. Most days, he quietly accepts the lunch I pack for him. 


This idea for a granola bar has been swirling around in my head for awhile now. It contains all the flavor components that I know my husband likes. The best way of describing it might be peanut butter cup - meets rice krispie treat - meets peanut chew. A simple ingredient list with few steps, I can toss it together quickly and store it in the freezer for days when I can't quite find the time to restock my husband's favorite chocolatey desserts. 

I finally got around to making it for him the other day. Unfortunately, and unbeknownst to either of us, there was a mix up with my husband's scheduled colonoscopy. Instead of taking place in July as we both thought, he was expected bright and early the next morning. Which meant he could not eat a thing the day I made this new treat.

And to make matters worse, I made him critique these photos for the blog, while his stomach grumbled for the dinner he couldn't have.

Oy, bad wife!

On the bright side, my husband is now happily munching his way through the batch of bars. Apparently, he started sometime around midnight while I was fast asleep. When I awoke, it was to a cup of freshly made coffee and the comment "those bars are awesome - you need to make more!" Perhaps I'm not a completely crappy wife.

For my taste, these are sweet. I like to take a few bars and cut them into small squares for myself. Then I wrap them in parchment paper, tuck them into a container or small ziplock bag, and store them in the freezer until I have a craving. They thaw fairly quickly - in just 30-45 minutes they are soft enough to eat.

But for the rest of you chocolate peanut butter lovers, just pop them in the fridge for up to a week. Not that they'll last that long...
Picture
Picture
Ingredients:
1 cup rolled oats
1 cup unsalted peanuts, roughly chopped
1 cup semi-sweet chocolate chips
2 cups brown rice krispie cereal
1/4 cup coconut oil
1/4 cup peanut butter
1 cup brown rice syrup
1 tablespoon vanilla paste
pinch of salt

Directions:
Line an 8-inch square pan with parchment paper.

In a bowl, toss the oats, peanuts, chocolate chips and rice krispies until evenly combined. Set aside.

In a large saucepan, melt the oil, butter and syrup over medium-high heat, about 2-3 minutes, stirring frequently. Add the vanilla and salt. Remove from heat and fold in the cereal mixture with a rubber spatula. Tip: The chocolate chips will melt during this step, allowing the chocolate to be evenly distributed throughout the bars. Transfer the mixture to the lined pan and gently press into an even layer with the spatula. Refrigerate for at least 2 hours. Cut into even bars.

Storage:
1. Return the cut bars to the pan, cover with plastic wrap and refrigerate for up to 1 week.
2. Wrap each bar in parchment paper and stack in a container or ziplock bag. Freeze for up to 3 months.

​Yield: 8-10 bars
Pin It
0 Comments

{Vegan} Raspberry Rice Krispie Treats

2/14/2017

0 Comments

 
Picture
Happy Valentine's Day!

Today, these Raspberry Rice Krispie Treats seem just the right recipe to share. They are sweet and sour, which in my mind, defines the emotional spectrum that many of us experience this time of year. Not to mention that my Caramel Kamut Krispie Treats continue to be one of my most popular posts, and are overdue for a follow-up companion recipe!

My husband and I occasionally celebrate Valentine's Day, but more often we agree that it is too gimicky for our taste, putting a lot of strain on even the best relationships. Though my husband does have the quirky habit of buying me candy the day after the holiday, so that he can get the 50% markdown. Which I find absolutely hilarious and impossibly annoying at that same time. But this year, we are neck-deep in a labor of love that is both joyful and very stressful. There is not much left to spare on discounted candy for the moment.

Right now, we are in the midst of trying to flip a house. Which in theory should not be terribly hard with my background in real estate and my husband's in construction. I refer to it as our "Radical Side Hustle House," because for me it is a step on a path to possible early retirement and something that I work on in between training clients and trying to build this blog. But for my husband it is a new full-time business venture. It is also why, more recently, my posts here are less frequent. In my limited, less experienced way, I am trying to contribute what I can to help complete this project.

For this to happen, we sold our beautiful home, put most of our things into storage, moving with our 2 dogs and 1 cat into a relative's house where we try to co-exist peacefully with one bathroom and a semi-functional kitchen. The arrangement is awkward, and after more than a year of this set-up, let's just say it's getting a bit stale for everyone! 

We have also cut way back on everyday joys, like shopping, eating out and going to the movies to ensure that we're not mindlessly overspending. I even cancelled a 40th birthday trip to NYC and asked my husband not to buy me anything. He did anyway, ironically bringing home all the just released full-price Valentine's stuff (my birthday was weeks ago), which made me laugh. 

Do we have to go to this extreme? Maybe not. I tend to be ultra conservative. More so when I feel unsettled with so many unknowns in our future. It's a mindset. I grew up feeling very poor, even though I had plenty of food and things to entertain myself. But my discipline and frugality coupled with my husband's amazing work ethic will likely see us through this and into a better position than when we began.


Currently we are in the last quarter of the renovation stage. I'm in charge of the budget - paying the bills, organizing and recording the receipts for labor/materials, trying not to stress my husband out with my stress about the budget, house demolition work (complete), co-designing the house itself plus various painting and clean-up projects. My husband is the general contractor, completing many of the renovations himself or with the help of other contractors, as the budget allows. Our plan is to have the property on the market by spring, move into it until it sells, then acquire a smaller inexpensive home while we continue on this new path. The ultimate goal being to flip a few houses until we build up enough to afford a multitude of rental properties.
Picture
Behold Our Labor of Love! 
That about sums up the sweet and sour of how I am living right now, minus a few details. I still actively blog, just not as frequently as before. Eventually, I will return to posting at least twice a week.

Also in the pipeline are two e-books that I have started to write - one on planning a manageable, affordable first-time trip to Scotland. The second is a vegan cookbook, the specifics of which I am withholding until closer to completion. 

In the meantime, if you tend to crave fruity things like sour gummy candies or twizzlers, give these Raspberry Rice Krispie Treats a try. They are incredibly simple and quick to make. I prefer them just as pictured, or occasionally dipped in chocolate for extra sweetness.
I Quit Sugar Kids Cookbook - PRINT
Picture
Ingredients:
​1/2 cup freeze dried raspberries, plus 1/2 cup reserved
1/3 cup solid coconut oil
2/3 cup brown rice syrup
1 tablespoon pure vanilla paste or 1 teaspoon extract
4 cups brown Rice Krispie cereal

Directions:
Line a loaf pan with parchment paper and set aside.

In a blender, grind the first 1/2 cup of the raspberries into a powder. Using a large non-stick saucepan, melt the oil and syrup over medium-high heat. Stir in the vanilla and ground raspberries. Bring to a boil and remove from heat. Fold in the cereal and reserved whole raspberries until completely coated. Firmly and evenly press the mixture into the lined pan using a rubber spatula. Refrigerate until firm, about 30 minutes. Use the parchment paper to lift from the pan. With a chef's knife, carefully cut into 8 squares. Store at room temperature. 

​Yield: 8 bars
0 Comments

{Vegan} Key Lime Mousse with Cherry Sauce

12/21/2016

0 Comments

 
Picture
Does anyone notice the terrarium effect here? Almost too pretty to eat! But don't wait too long, because exposure to oxygen will eventually cause the mousse to brown. Kind of ruins the whole eat-with-your-eyes effect.

Ironically, when I truly love something, it tends to sit untouched. For some silly reason, I have this impulse to save it - for what I don't know. Case in point, there is an apple pie scented candle that I have been hanging onto for YEARS because it smells so amazing. But instead of lighting it, I keep on using up the less worthy candles in my collection. In fact, burning fiercely from atop my table as I write this, is the most repulsive pine candle I have ever smelled - surely a regift from someone who was desparate to get rid of the thing.

Similarly, I have a bag of dark cherries in my freezer that I can't bear to part with. Even though the store where I purchase them is located just 15 minutes down the road. Instead, I buy, eat and re-buy frozen raspberries - which I like well enough, but not nearly as much as the cherries!

In trying to break myself out of this funny pattern, I'm putting my prized ingredient to good use here. Nice and sweet, the cherry sauce offsets the tangy lime mousse which on its own might be a bit tart. Combined with the crunchy toasted almonds, it makes for a very tasty dessert!

This is a vegan treat, so even a person with severe dairy intolerance can enjoy it. Some might wonder why a vegan recipe would be posted on a blog that is clearly not strictly vegan. Well, this particular blog doesn't discriminate. The focus here is finding ways to supply the body with the nutrition it needs, largely through plant-based foods, without excluding the occasional hankering for meat, fish or even cheese.

So that you might add to your own collection of much-loved treasures, I've included links to some of my favorite cookbooks just beneath this recipe. These I do use regularly, cooking a variety of recipes from each one. But even if you prefer to admire rather than use these books, the photographs and the writing that they contain are wonderfully uplifting and inspirational.
Picture
Ingredients:
2 cups frozen pitted dark sweet cherries
1 tablespoon cornstarch
​1 tablespoon lime juice
1 tablespoon vanilla paste
2 tablespoons maple syrup
1/2 cup sliced almonds
1 large banana, peeled
1 tablespoon lime zest
juice of 2 limes
1/4 cup confectioners sugar or maple syrup
2 large avocados, peeled and pitted
2 sprigs fresh mint or thinly sliced lime

Directions:

CHERRY SAUCE:
Combine the cherries and cornstarch in a sauce pan, stirring until the cherries are coated with the cornstarch. Add the lime juice, vanilla and syrup. Heat over medium-high, stirring frequently until the cherries thicken and reduce, about 8-10 minutes. Remove from heat and set aside to cool. Spoon about half of the sauce into the bottom of two stemless wine glasses, leaving enough leftover to top the prepared mousse.

TOASTED ALMONDS:
Pour the almonds into a sauté pan and toast over medium heat, until lightly browned on both sides. Remove from heat and pour the almonds into a bowl to stop the cooking process. Allow to cool, then sprinkle half of the nuts over the first layer of cherry sauce.

KEY LIME MOUSSE:
Fit a piping bag with a wide tip such as the Wilton Star Tip #2110. In a food processor or blender, combine the banana, zest, lime juice, sugar, (or syrup if using) and avocados. Puree until thick and smooth. Using a rubber spatula, transfer the mousse into the piping bag and pipe equal amounts into both serving glasses. Top with remaining cherry sauce and almonds. Garnish with sprigs of mint or slices of lime.

Yield: 2 servings

My Favorite Cookbooks This Year:
Yum
0 Comments

Chocolate Gingerbread Cake {Gluten-Free}

12/12/2016

0 Comments

 
Picture
Happy December! This is my birthday month, which could not be less fitting for a person who dislikes winter. And this year is a huge milestone one, which I would love to be spending on a beach somewhere. But alas, my husband and I are neck deep in a house-flipping adventure. So instead, we'll be spending a couple of nights in a beautiful New York City hotel overlooking Central Park, using travel points that I keep in my aresenal for just such an occasion. Despite the cold, I'm looking forward to some serious museum, Broadway and park time. 

So, in honor of my birthday, I've been fighting with this cake. My intention was to post the recipe this time LAST week, but I wasn't happy with the spice-to-chocolate ratio. First it was too bland. Then it was too overpowering to taste any chocolate. The one constant was the texture. This cake came out moist and light every time. 

There is a lot of room to make this cake to your own liking depending on which end of the flavor ratio you like best - chocolate, gingerbread or both? Jazz it up with frosting, or use a stencil to create a sugary winter scene like the one pictured. Toss chocolate chips or spicy candied ginger into the batter for a little zing. As written, this recipe tries to balance the two flavors equally, though personally I prefer my cake a bit more gingerbready.
Picture
Ingredients:
cooking spray
2 cups gluten free oat flour
1/4 cup natural unsweetened cocoa powder
1 teaspoon baking powder
2 teaspoons ground ginger
1 teaspoon cinnamon

1/2 teaspoon ground cloves
1/2 teaspoon ground nutmeg
​1/2 cup semi-sweet chocolate chips
1/4 cup coconut oil
1/3 cup unsulphured molasses
1/2 cup coconut or dark brown sugar
1/2 cup unsweetened almond milk

2 large eggs
1/2 cup semi-sweet chocolate chips, optional*
1/4 cup diced candied ginger, optional*
1/4 cup powdered sugar, optional*

Directions:
Pre-heat the oven to 350ºF. Grease an 8x8 non-stick baking pan with cooking spray.

In a large mixing bowl, sift together the flour, cocoa, baking powder, ginger, cinnamon, cloves and nutmeg. Set aside.

In a non-stick saucepan, melt the chocolate chips, oil, molasses and sugar over medium-high heat, stirring constantly until smooth. Remove from heat and allow to cool slightly. Stir in the flour mixture and milk, a little at a time, until a batter forms. Whisk the eggs into the batter, which should now be thin and fairly liquidy. Fold the chocolate chips or candied ginger into the batter, if using. Pour the batter into the baking pan and bake for 20-25 minutes, or until a toothpick comes out smooth. Allow to cool, then top with powdered sugar or frosting of choice.

Yield: 9 servings

Start the New Year right with this offer!
Spring eBook Pack
Yum
0 Comments

Caramel Kamut Krispie Treats {Vegan}

11/7/2016

0 Comments

 
Picture
Lately, the term healthier is getting some attention because of how confusing it is to a lot of people. Generally, the way I define a product as being healthier than its original version is to say that it contains a nutrient-rich base, as opposed to being deficient of any nutritional value at all, without any added chemicals or artificial ingredients, while also retaining a less healthy component such as sugar, sodium or fat. 

In simpler terms, healthier just means containing something good-for-you while still having an element that is not-so-great for your health if eaten in large quantities. 

Let's break down this healthier recipe, comparing it to a traditional rice krispie treat as an example. Unlike puffed rice cereal, Kamut is a nutrient-dense whole grain, which I describe below in more detail. The nut (or seed) butter replacing the dairy butter, is protein rich with heart-healthy mono and polyunsaturated fats that provide the body with energy. Instead of gelatin and artificial ingredient filled marshmallows, brown rice syrup serves as both a sweetener and a binder. However, this syrup is essentially just glucose (sugar), meaning that it is not any healthier than table sugar, even though it is derived from brown rice. So why use it? Because it is a single ingredient product that produces a flavor and consistency much closer to a traditional rice krispie treat than any other plant-based item can provide. The vanilla in this recipe is also free of chemicals, additives or artificial ingredients.

What is kamut? It is an ancient form of wheat originally found in the Middle-Eastern region of Asia. Kamut is a registered trademark, therefore all products must satisfy a strict set of standards in order to be sold under that name. These include being organically grown, pure and uncontaminated by modern varieties of wheat, non-GMO and free of disease. Kamut must also contain 12-18% protein and 400-1000 ppb selenium. Finally, it must be marketed in a non-deceptive way, assuring the consumer that the product is the pure ancient variety. In addition to protein and selenium, Kamut contains the essential nutrients fiber, niacin, magnesium, manganese and B-vitamins. These are all nutrients that are not naturally produced by our bodies and are essential to our ability to function.

This recipe is as easy as the original rice krispies version. Just four to five ingredients. Same method: melt, mix, press and cool. But packed with whole grains and protein to keep you full and energized for hours.
IQS The Lunchbox Book
Picture
Picture
Ingredients:
1 cup brown rice syrup
1 cup unsweetened, unsalted almond, cashew, peanut or sunflower seed butter
1 teaspoon pure vanilla paste or extract
pinch of salt to taste, optional*
6 cups puffed kamut cereal

​Directions:
*Make in two separate batches.

Start out by heating water in a large double-boiler. Or improvise by placing a medium size metal mixing bowl over a pot of boiling water. Melt half of the the syrup in the boiler, then stir in half of the butter, vanilla and salt, if using. Gently fold 3 cups of the cereal into the mixture until coated.

Line an 8" cake pan with parchment paper. Pour the mixture into the pan and using a rubber spatula, press into an even layer. Repeat the same steps to make the second batch and firmly press it overtop of the first layer.

Allow to set in the refrigerator for 30 minutes. Slice into bars or squares. Store at room temperature in mild-to-colder climates, refrigerate in warmer climates.

Yield: 8-10 servings
Yum
0 Comments

Cranberry-Grape Crisp {Gluten-Free + Vegan + Nut-Free}

10/24/2016

5 Comments

 
Picture
This unusual dessert is perfect for cheese and wine parties or potlucks. Few people are familiar with grape tarts and pies, so if you consider yourself a trendsetter this recipe will be sure to impress.  

Concord grapes are rather labor intensive and difficult to find. Their availability tends to be limited to the autumn months and the idea of removing the skins and seeds might seem off-putting. Don't let this be a deterrent! Simply pinch the non-stem end and the pulp will burst through the other side. Once you get the hang of it, this step takes less than 5 minutes to complete. After the grape pulp is cooked down, the seeds are easily separated when the pulp is pressed through a metal sieve with the back of a spoon. Finally, add everything back into your saucepan — pulp, skins, cranberries and lastly, flavor enhancers and thickeners.

The flavor is meant to be on the sour side, with the sweetness of the grapes and a little sugar balancing out the cranberries. However, the sugar content can be adjusted to suit individual preference. I recommend adding the sugar in increments, tasting the filling as you go. 

The crust can be made a day or two ahead, as it needs a period of refrigeration before baking. I find that this prevents cracks from forming. For a prettier presentation bake the tart the same day that you will be serving it.

From a nutritional standpoint, concords are a super-fruit from the berry family. They are recommended by The American Heart Association for their polyphenol (phytonutrient) content, which help keep the blood vessels and arteries clear of sticky LDL or "lousy" cholesterol and maintain arterial elasticity allowing for easier blood circulation. According to The American Institute for Cancer Research, dark grape skins are especially concentrated in a long list of antioxidants including resveratrol and anthocyanin. Both are shown to inhibit cellular damage by decreasing inflammation and cellular oxidative stress thereby diminishing the development or growth of cancer cells. Studies show other potential benefits of consuming dark pigmented grapes include: improved cognitive health, blood sugar/insulin stabilization and slowing the effects of aging.

Cranberries possess many of the same anti-oxidative compounds found in concord grapes, aiding the body in the prevention of cancers, heart disease, diabetes, neurological disorders, bacterial infections and tooth decay.

Now that you're armed with all of this information, grab your aprons, get baking, and don't forget to share copies of the recipe!

​Follow me on Instagram for more recipe inspiration: ​https://www.instagram.com/embodyfitnessblog/
Picture
Picture
Ingredients:

Crust:
3 cups gluten-free oat flour or 3 cups rolled oats
2 teaspoons baking powder
1/4 cup light brown or coconut sugar
1/4 cup raisins or dried cranberries, chopped
1/2 cup solid coconut oil, at room temperature

Filling:
4 - 5 cups Concord grapes
1/2 cup frozen or fresh cranberries
1/3 cup light brown or coconut sugar
2 - 3 tablespoons cornstarch
1 teaspoon orange zest

1 tablespoon orange juice

Topping:
1/2 cup reserved dough crumbs, see directions*

2 tablespoons rolled oats

*Cook's Notes: Make sure that the oil is spreadable. It should be neither solid nor completely liquid before combining it with the flour. This can be achieved by microwaving the oil for about 15 seconds or refrigerating for about 10 minutes, depending on the consistency. 

​Directions:
​

Make-Ahead Crust:
If using rolled oats, pour into
a high speed blender or food processor and grind into a flour consistency.

In a bowl, mix together the flour, baking powder and sugar, pressing out any lumps. Stir in the raisins or dried cranberries until fully coated with flour. Combine the oil with the flour and mix by hand until a crumbly dough forms. The dough should hold together when squeezed. Set aside 1/2 cup of dough crumbs in a sealed container for the topping. Press the remaining dough into the sides and then the bottom of the tart pan. Cover with cling wrap and refrigerate for at least 30 minutes and up to 2 days.
​
Filling:
Separate the grapes from the skin by gently squeezing the pulp through the stem end into a bowl, reserving the grape skins for later use. Pour the pulp into a sauce pan and cook on medium-high until softened, about 5-7 minutes. Remove from heat and strain into a bowl using a metal mesh sieve. Use the back of a spoon to press the pulp through the sieve. Discard the seeds and return the pulp and all of its juices to the pan. Stir the grape skins, cranberries, sugar, cornstarch, orange zest and juice into the pulp mixture. Cook over medium-high heat for another 5 minutes, or until it thickens, stirring frequently. Remove from heat and allow to cool slightly. 

Baking:
Pour the filling into the chilled tart shell, using a rubber spatula to spread the fruit evenly over the bottom of the crust. Combine the reserved dough with the oats. Sprinkle over the filling in any pattern desired. Bake at 350ºF for 35-40 minutes. Allow to cool for at least 15 minutes before serving.


Yield: 8 servings
Yum
5 Comments

Blackberry Apple Tart {Gluten-Free + Vegan}

10/1/2016

0 Comments

 
Picture
Finally, reluctantly, it seems time to embrace the fact that our glorious New York summer is over and the autumnal comfort food season is in full swing. I have a slight head start on this transition due to my recent visit to Scotland.

Weather-wise, Scotland is ahead of us here in the Northeastern/Mid-Atlantic United States by about a month. In other words, September there feels like October here. During this time Scotland's blackberry season overlaps with its apple season, both of which typically last until November. Scotland's love of these fruits is particularly evident in the city of Edinburgh, which is currently chock full of pastry shops and dessert menus featuring the berry-apple pairing. Unfortunately, most desserts there also contain tons of butter and refined white flour.

Here at home where I have more control over what I eat, I prefer to lighten my baking where I can in order to enjoy a treat without ruining my health. Usually by substituting alternative ingredients while keeping others.

In this case, plant-based coconut oil replaces the butter, while a combination of Bob's Red Mill whole grain oat flour and rolled oats stand in for the white flour that is typically in a tart recipe. These changes introduce antioxidants, vitamins and minerals, heart healthy soluble fiber and antimicrobial properties for the digestive tract lacking in classic pie shells. What remains is the sugar, which can easily be reduced or eliminated depending on tolerance.

Additionally, there are many health benefits derived from cooking with apples. Helen Nichols, editor-in-chief and author for Well-Being Secrets, writes in-depth on this topic in a recent article posted here: http://www.well-beingsecrets.com/apples-health-benefits/

I prefer fruit tarts over pies because they are faster and easier to pull together. This one has a shell that can be made 1-2 days in advance if kept refrigerated in plastic wrap. The filling is just a few quick steps to a beautiful showy result.

And on an extra happy note, my finicky hard-to-please husband approved this recipe. Usually he refuses to try anything that I prepare specifically for this blog. And while this attitude causes him to miss out on quite a few tasty foods in general, when he does like a dish he is usually, as they say in the UK, "Spot on."
Picture
Picture
Ingredients:
1 cup gluten-free rolled oats
2 cups gluten-free whole grain oat flour
1/4 cup brown sugar, plus 1 tablespoon reserved
2 teaspoons baking powder
1/2 cup solid coconut oil
4-5 tablespoons blackberry preserves
2 medium baking apples, peeled and cored
1 pint whole fresh blackberries
1 tablespoon apple pie spice

Directions:
In a food processor or blender, break up the rolled oats by quickly pulsing 2-3 times. In a mixing bowl, combine with the flour, sugar, and baking powder. Melt the coconut oil in a microwave-safe container for 20-30 seconds, or heat in a saucepan over medium-high until dissolved. Stir the oil into the flour mixture until a stiff dough forms. Press into the sides and bottom of a 9.5-inch tart pan with a removable bottom. Cover with plastic wrap and refrigerate for 30 minutes.

Pre-heat the oven to 350ºF. Spread the preserves evenly over the bottom of the chilled tart shell. Quarter the apples, then cut into thin slices. Arrange the apple slices in an overlapping circle around the outer edge of the tart. Then form an inner ring with the blackberries. Cube some of the remaining apple and arrange in the center of the tart. Place additional berries evenly around the outer edge of the tart. Sprinkle the apples with the pie spice and the reserved brown sugar. Bake for 40 minutes, or until the apples are tender.

Yield: 6-8 servings
Yum
0 Comments

Piña Colada Chia Pudding with Guava Sauce

8/31/2016

0 Comments

 
Picture
{This is not a sponsored post. All product recommendations are based on my own personal use and opinion of these products, and are meant simply as a guide to the reader.}

Today's recipe showcases a new ingredient: guava paste!

Guava paste can be made at home by slow cooking equal parts sugar and diced guava. The faster, and only available option in my area at this time of year, is the canned store bought variety. Goya Foods Brand Guava Paste, packaged in a flat tin and available in many grocery chains, is featured in this recipe. Most often guava paste is paired with cheese or incorporated into baked goods. The flavor is reminiscent of a fruit roll-up in jelly form, adding the perfect balance of sweetness when combined with other tropical ingredients.

​The next layer in this dessert is a simple mix of chia seeds, vanilla paste, pineapple and So Delicious Lite Culinary Coconut Milk which comes conveniently packaged in single use cartons. Not to be confused with canned coconut milk, lite culinary coconut milk is both lower in fat and the consistency of pourable cow's milk.

This is a make ahead dessert that is worth the wait. Be sure to allow plenty of time for it to set before adding the guava sauce. With this last step work quickly! Melted guava paste prefers its original form, returning to it within minutes. Finally, search your pantries for some crunch, top it off and enjoy!
Picture
Ingredients:
1 cup cubed pineapple, plus 1/4 cup reserved
11 ounces So Delicious lite culinary coconut milk
1 tablespoon vanilla paste or powder
2 tablespoons chia seeds
3 tablespoons water
4-6 tablespoons Goya guava paste
1/4 cup puffed millet or granola

Directions:
Blend the pineapple, milk and vanilla until smooth. Pour into a liquid measuring cup and stir in the chia seeds. Allow to thicken for 15 minutes.

Cut the reserved pineapple into small cubes and spoon into the bottom of the serving glasses. Equally divide the thickened chia mixture between the two glasses. Refrigerate overnight.

Over medium-high heat, combine the water and guava paste in a small pan. When the paste begins to heat up, use a whisk to break it apart. Turn the heat down to medium and continue whisking until smooth. Remove from heat, allowing to cool just slightly for about 1-minute. Quickly pour or pipe the sauce onto the chilled chia pudding to form a thin top layer, dividing equally between each glass. Refrigerate for at least 1 hour.

When ready to serve, top with puffed millet or granola of choice.

Yield: 2 servings

Products Used With The Recipe:
Yum
0 Comments
<<Previous
    Fitness Training:
    Located in the Hudson Valley or Westchester NY? Contact me for a trial in-home fitness training session!

    Author

    Sarah Inglis is a increasingly vegetarian non-vegetarian, as well as a certified fitness trainer, personal chef, freelance writer and food photographer with degrees in media communications and dietetics. This blog is a collection of healthy recipes, along with a bit of fitness & nutritional information.

    Links

    Affiliate links to products I use and think are great are posted on this site. This means I receive a small commission if you purchase a product through these links, though at no extra cost to you. This is both to cover costs for the blog and to provide helpful tools to the reader. Thank you for supporting Embody Fitness & Nutrition!

    Categories

    All
    Appetizers
    Breakfast
    Burgers/Sandwiches/Tacos
    Desserts
    Entrees
    Fitness Info
    Juice Recipes
    Nutritional Info
    Salad
    Sides
    Snacks
    Soup
    Toppings
    Travel

    Archives

    January 2018
    December 2017
    September 2017
    August 2017
    July 2017
    June 2017
    May 2017
    April 2017
    March 2017
    February 2017
    January 2017
    December 2016
    November 2016
    October 2016
    September 2016
    August 2016
    June 2016
    May 2016
    April 2016
    March 2016
    February 2016
    January 2016
    December 2015
    November 2015
    October 2015
    September 2015
    July 2015
    June 2015
    May 2015
    April 2015
    March 2015

    RSS Feed

© 2015-2018 Embody Fitness & Nutrition. All rights reserved. No content or images may be reproduced in any part or form without written permission.
Proudly powered by Weebly